RunningHub| App Details
Share API call 0
0 0Subscribe
00Advanced E-commerce Clothing Consistency_Model Multi-view Display
Apparel Display · Product Modeling · Consistent Characters
371
45
1874 runs
Charged by actual usage
Billing
Run Now
Standard
App Details
My Results
Follow
API
App Introduction
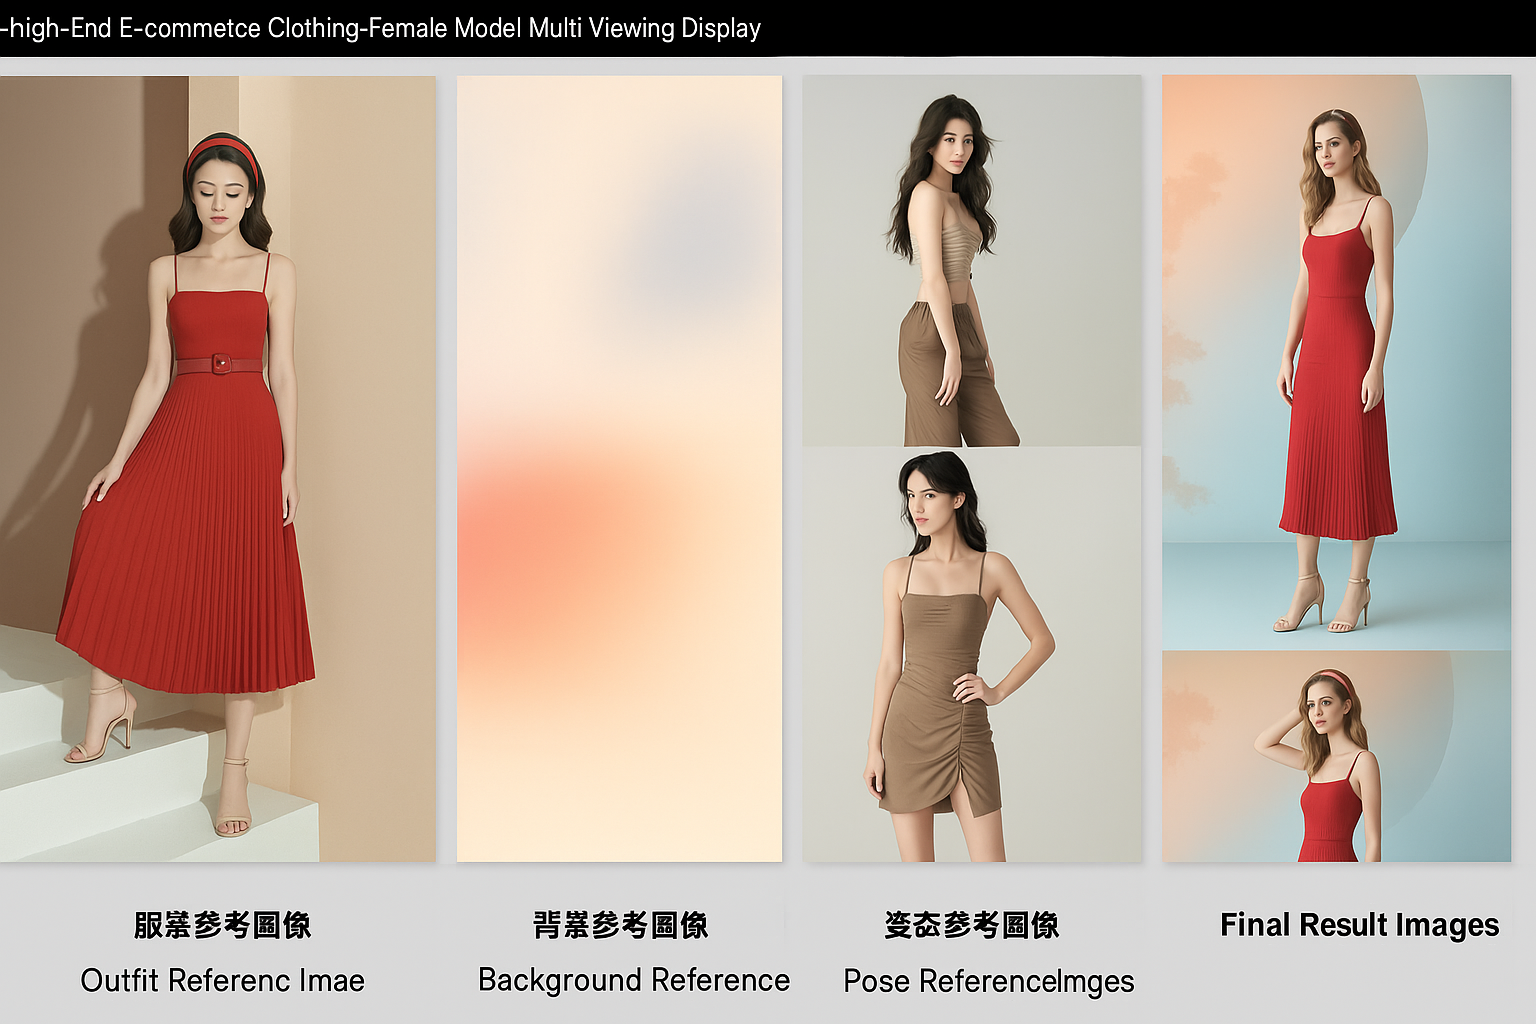
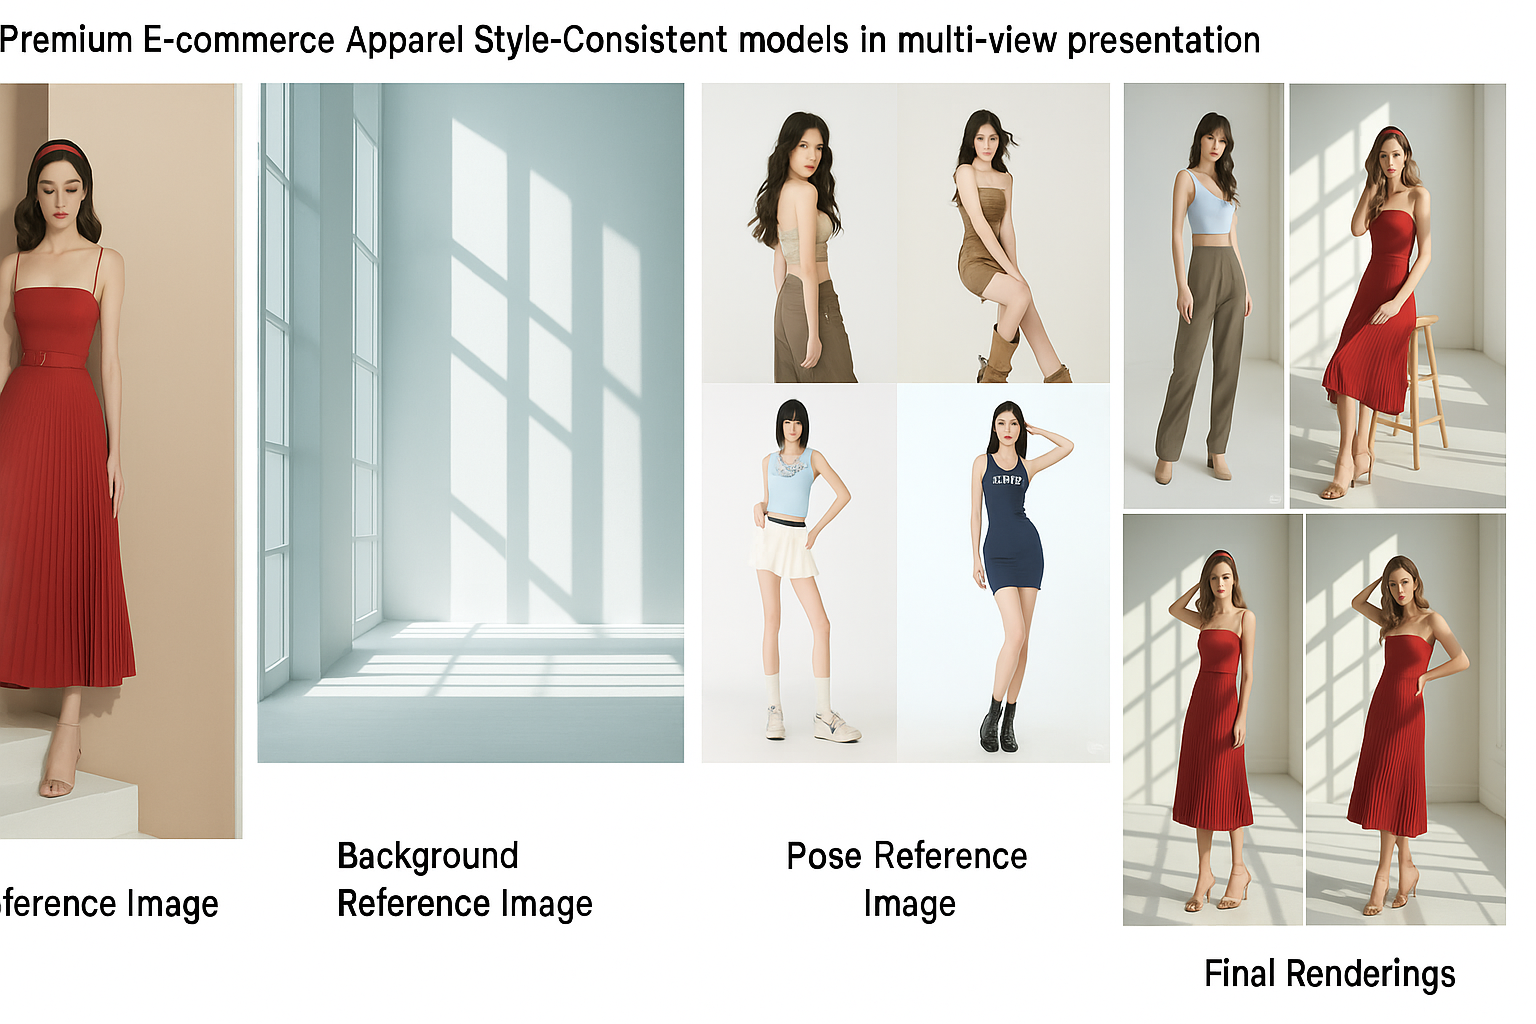
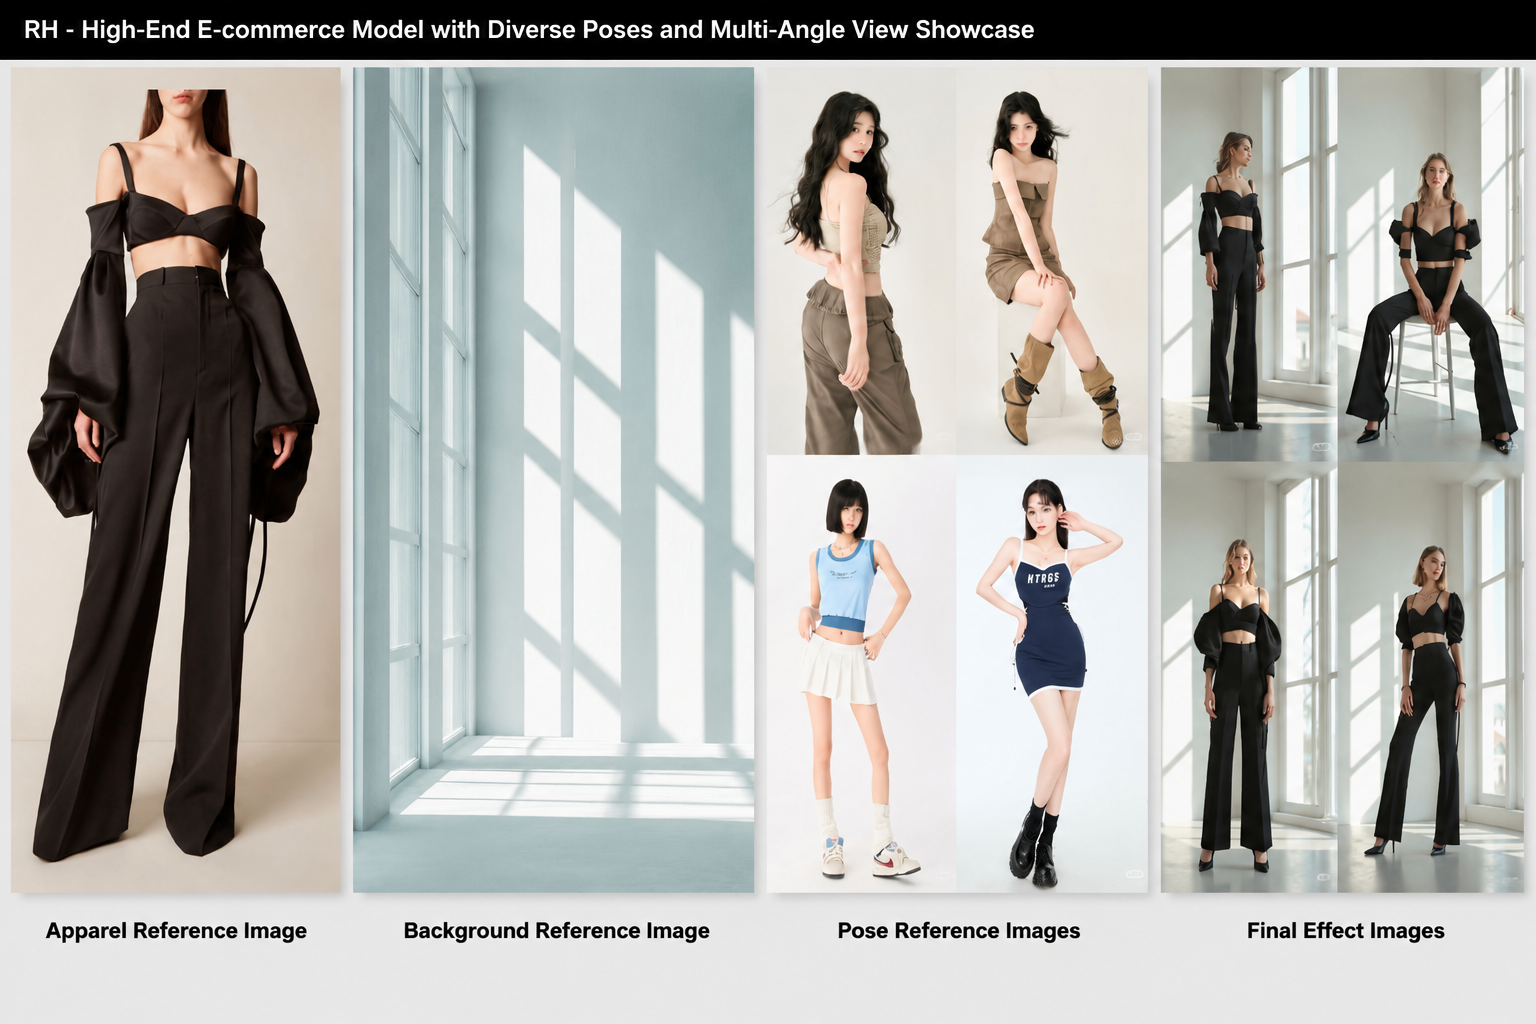
To create clothing display effects, simply follow these steps:
- Prepare reference images:
- Clothing reference images: Select images that clearly showcase the overall appearance, details, and features of the clothing. Ensure the clothing is the main focus of the image without hand obstructions, providing accurate clothing style information for the subsequent effect generation.
- Background reference images: Choose background images that match the display theme and style. Whether it’s a fashionable street scene or a quiet shooting location, ensure the image quality is clear and the composition is balanced to create a realistic display environment.
- Pose reference images: Create a four-in-one image that integrates four different angles of human poses. These poses should be natural and diverse, fully showcasing the dynamic effects of wearing the clothing.
- Upload images: Locate the upload section in the interface and follow the prompts to upload the prepared clothing reference images, background reference images, and pose reference images (four-in-one image) in sequence. Ensure the images are uploaded successfully without error messages.
- One-click run: Click the “Run” button, and the system will automatically start the processing program.
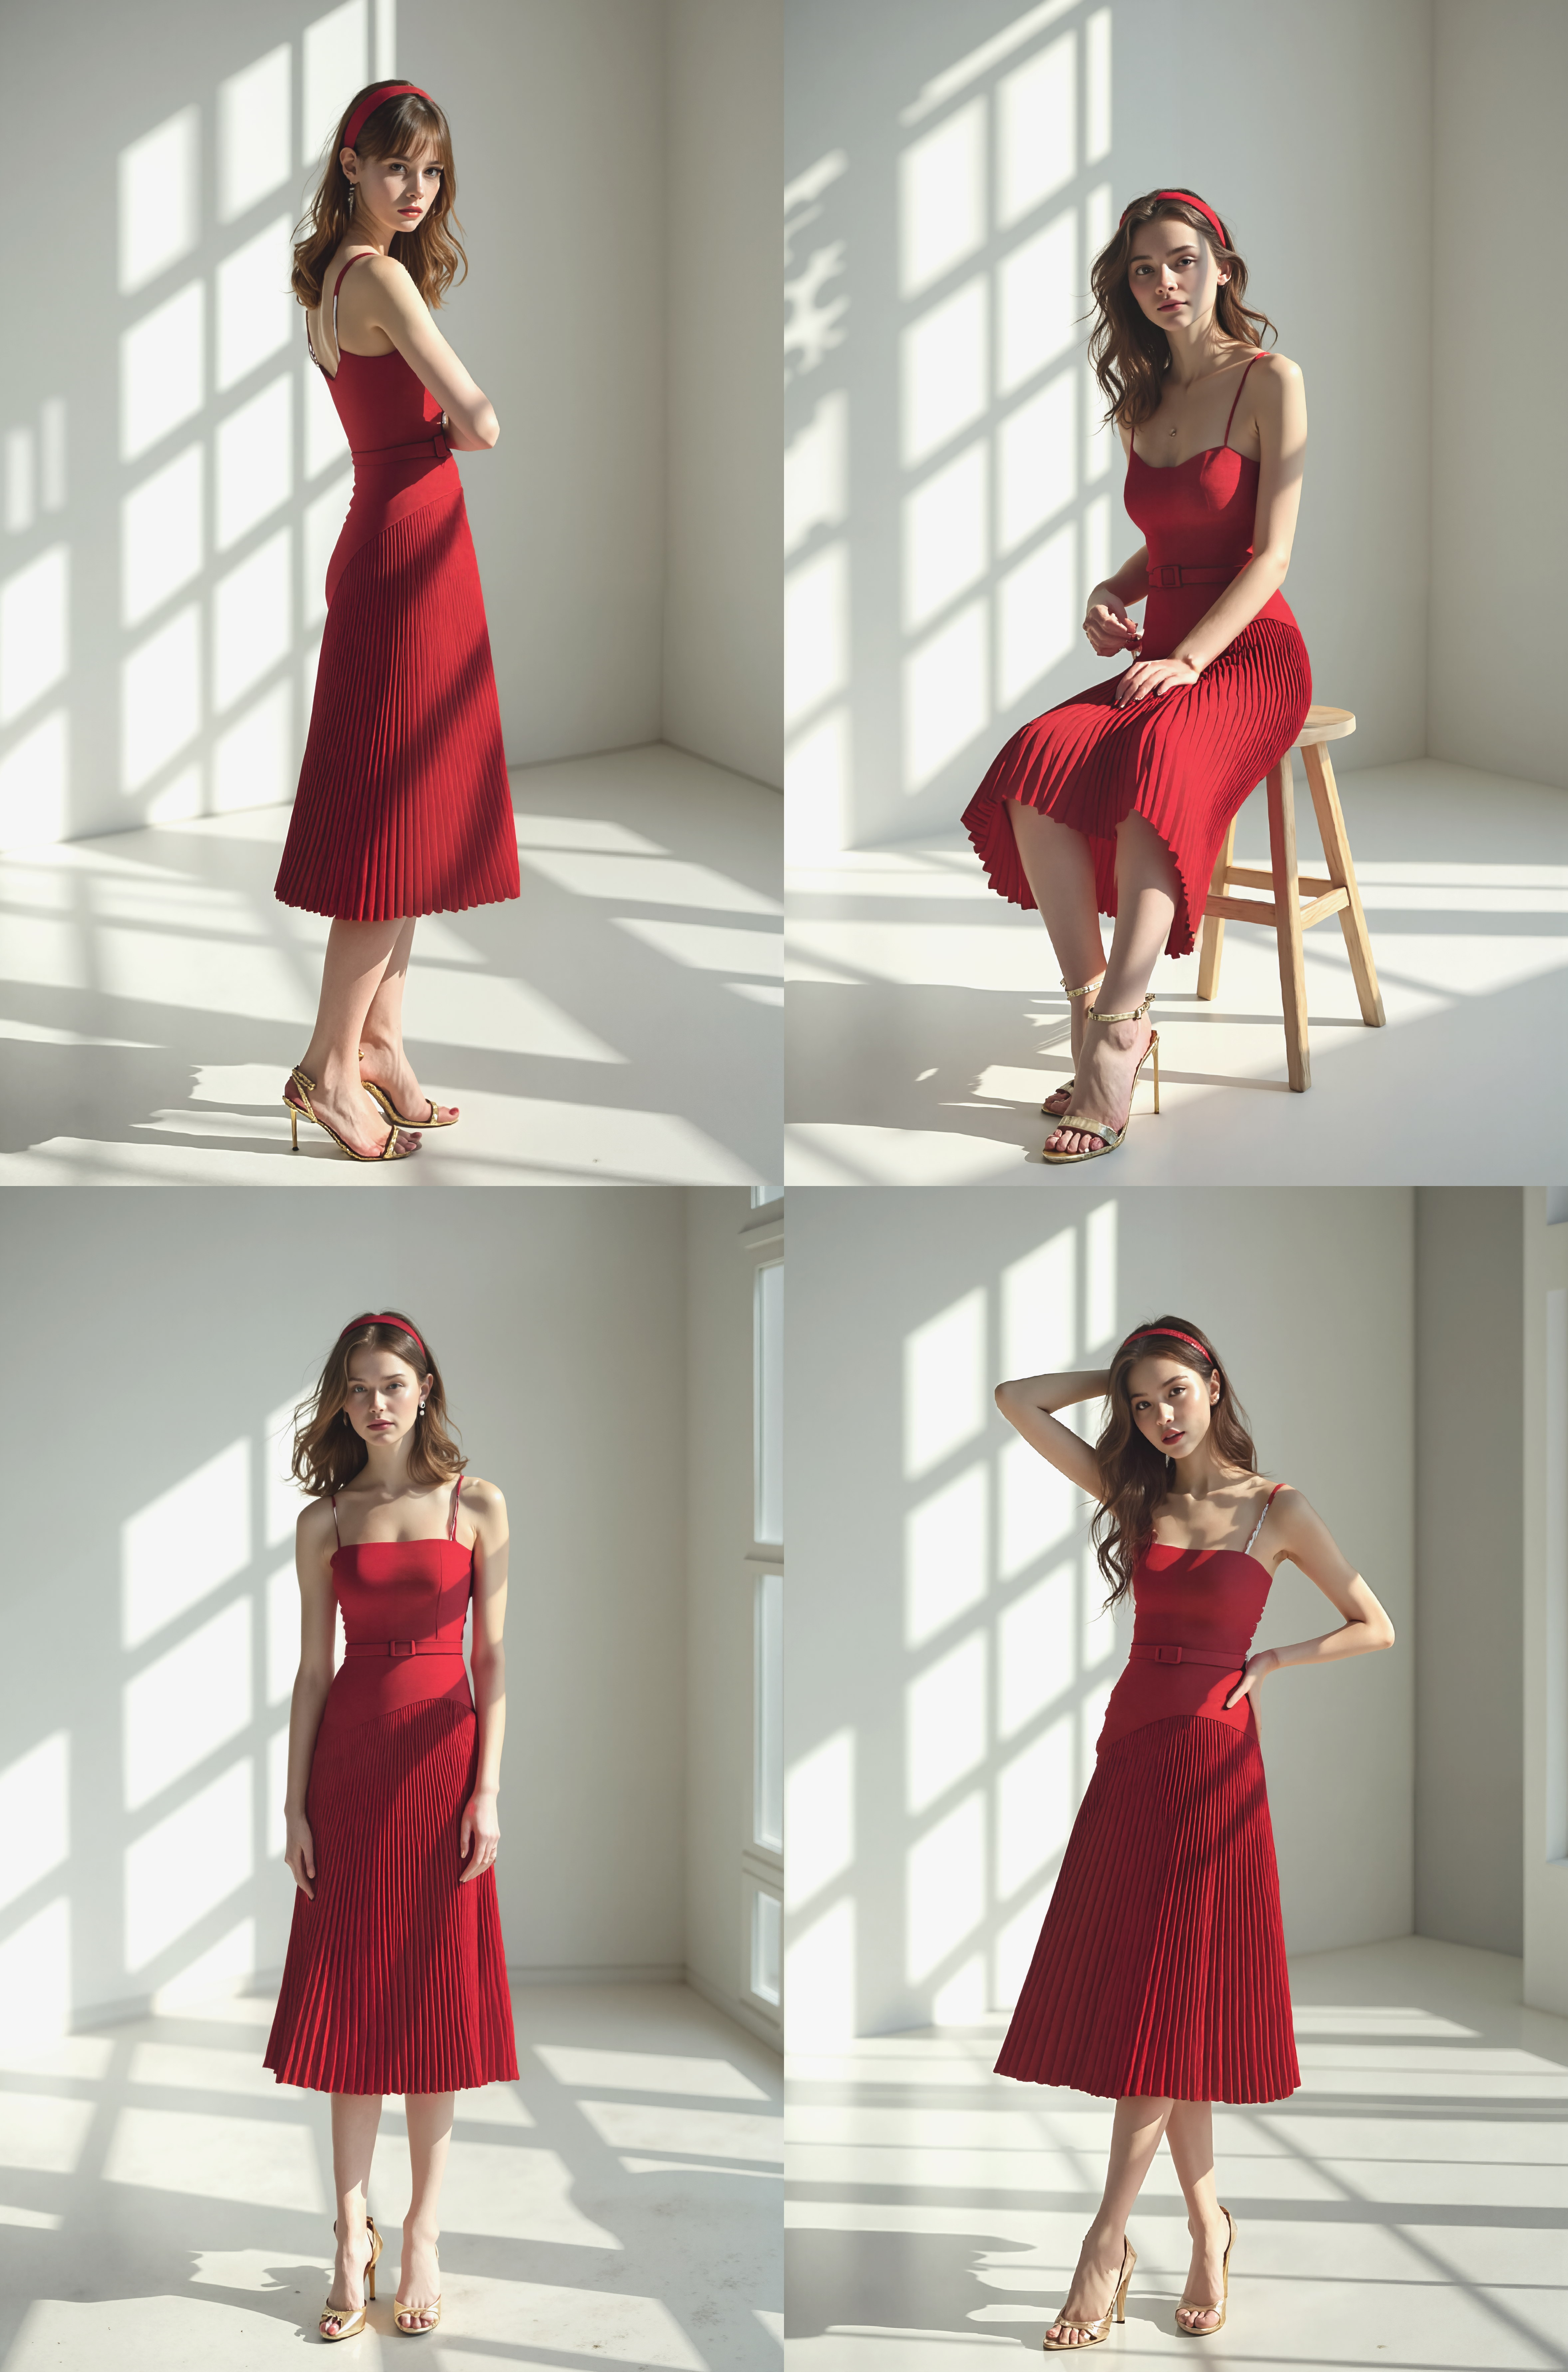
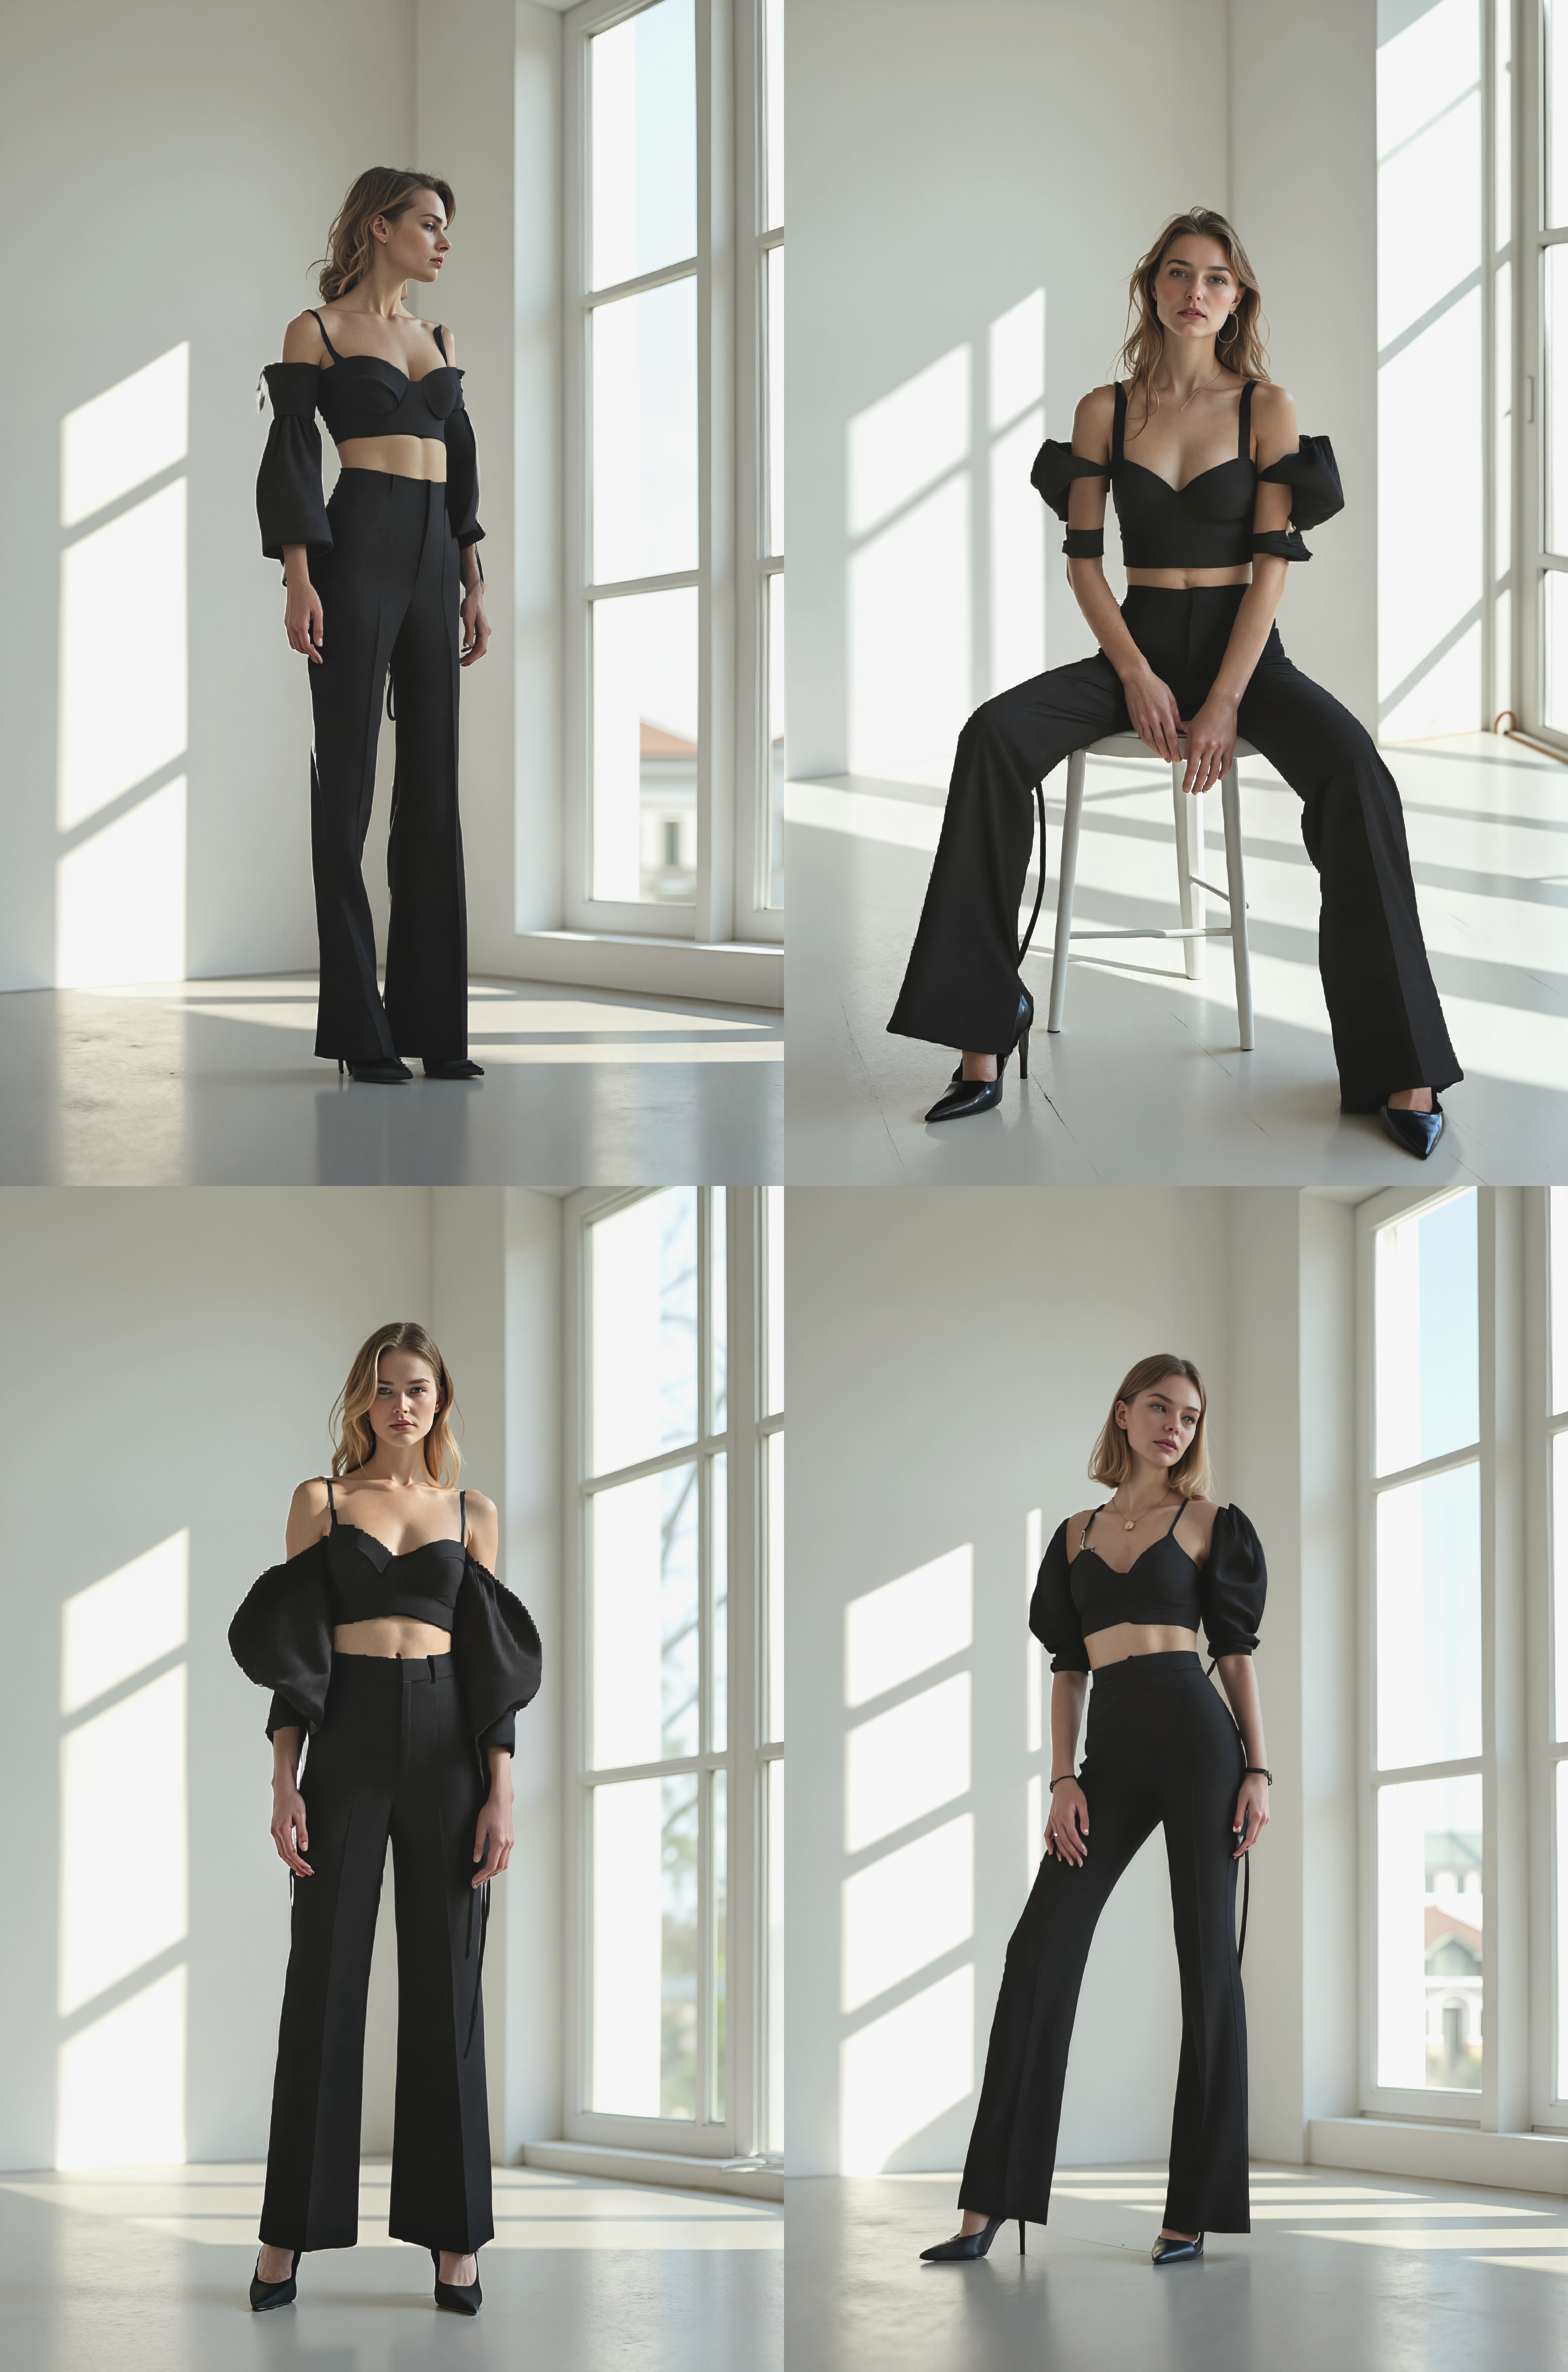
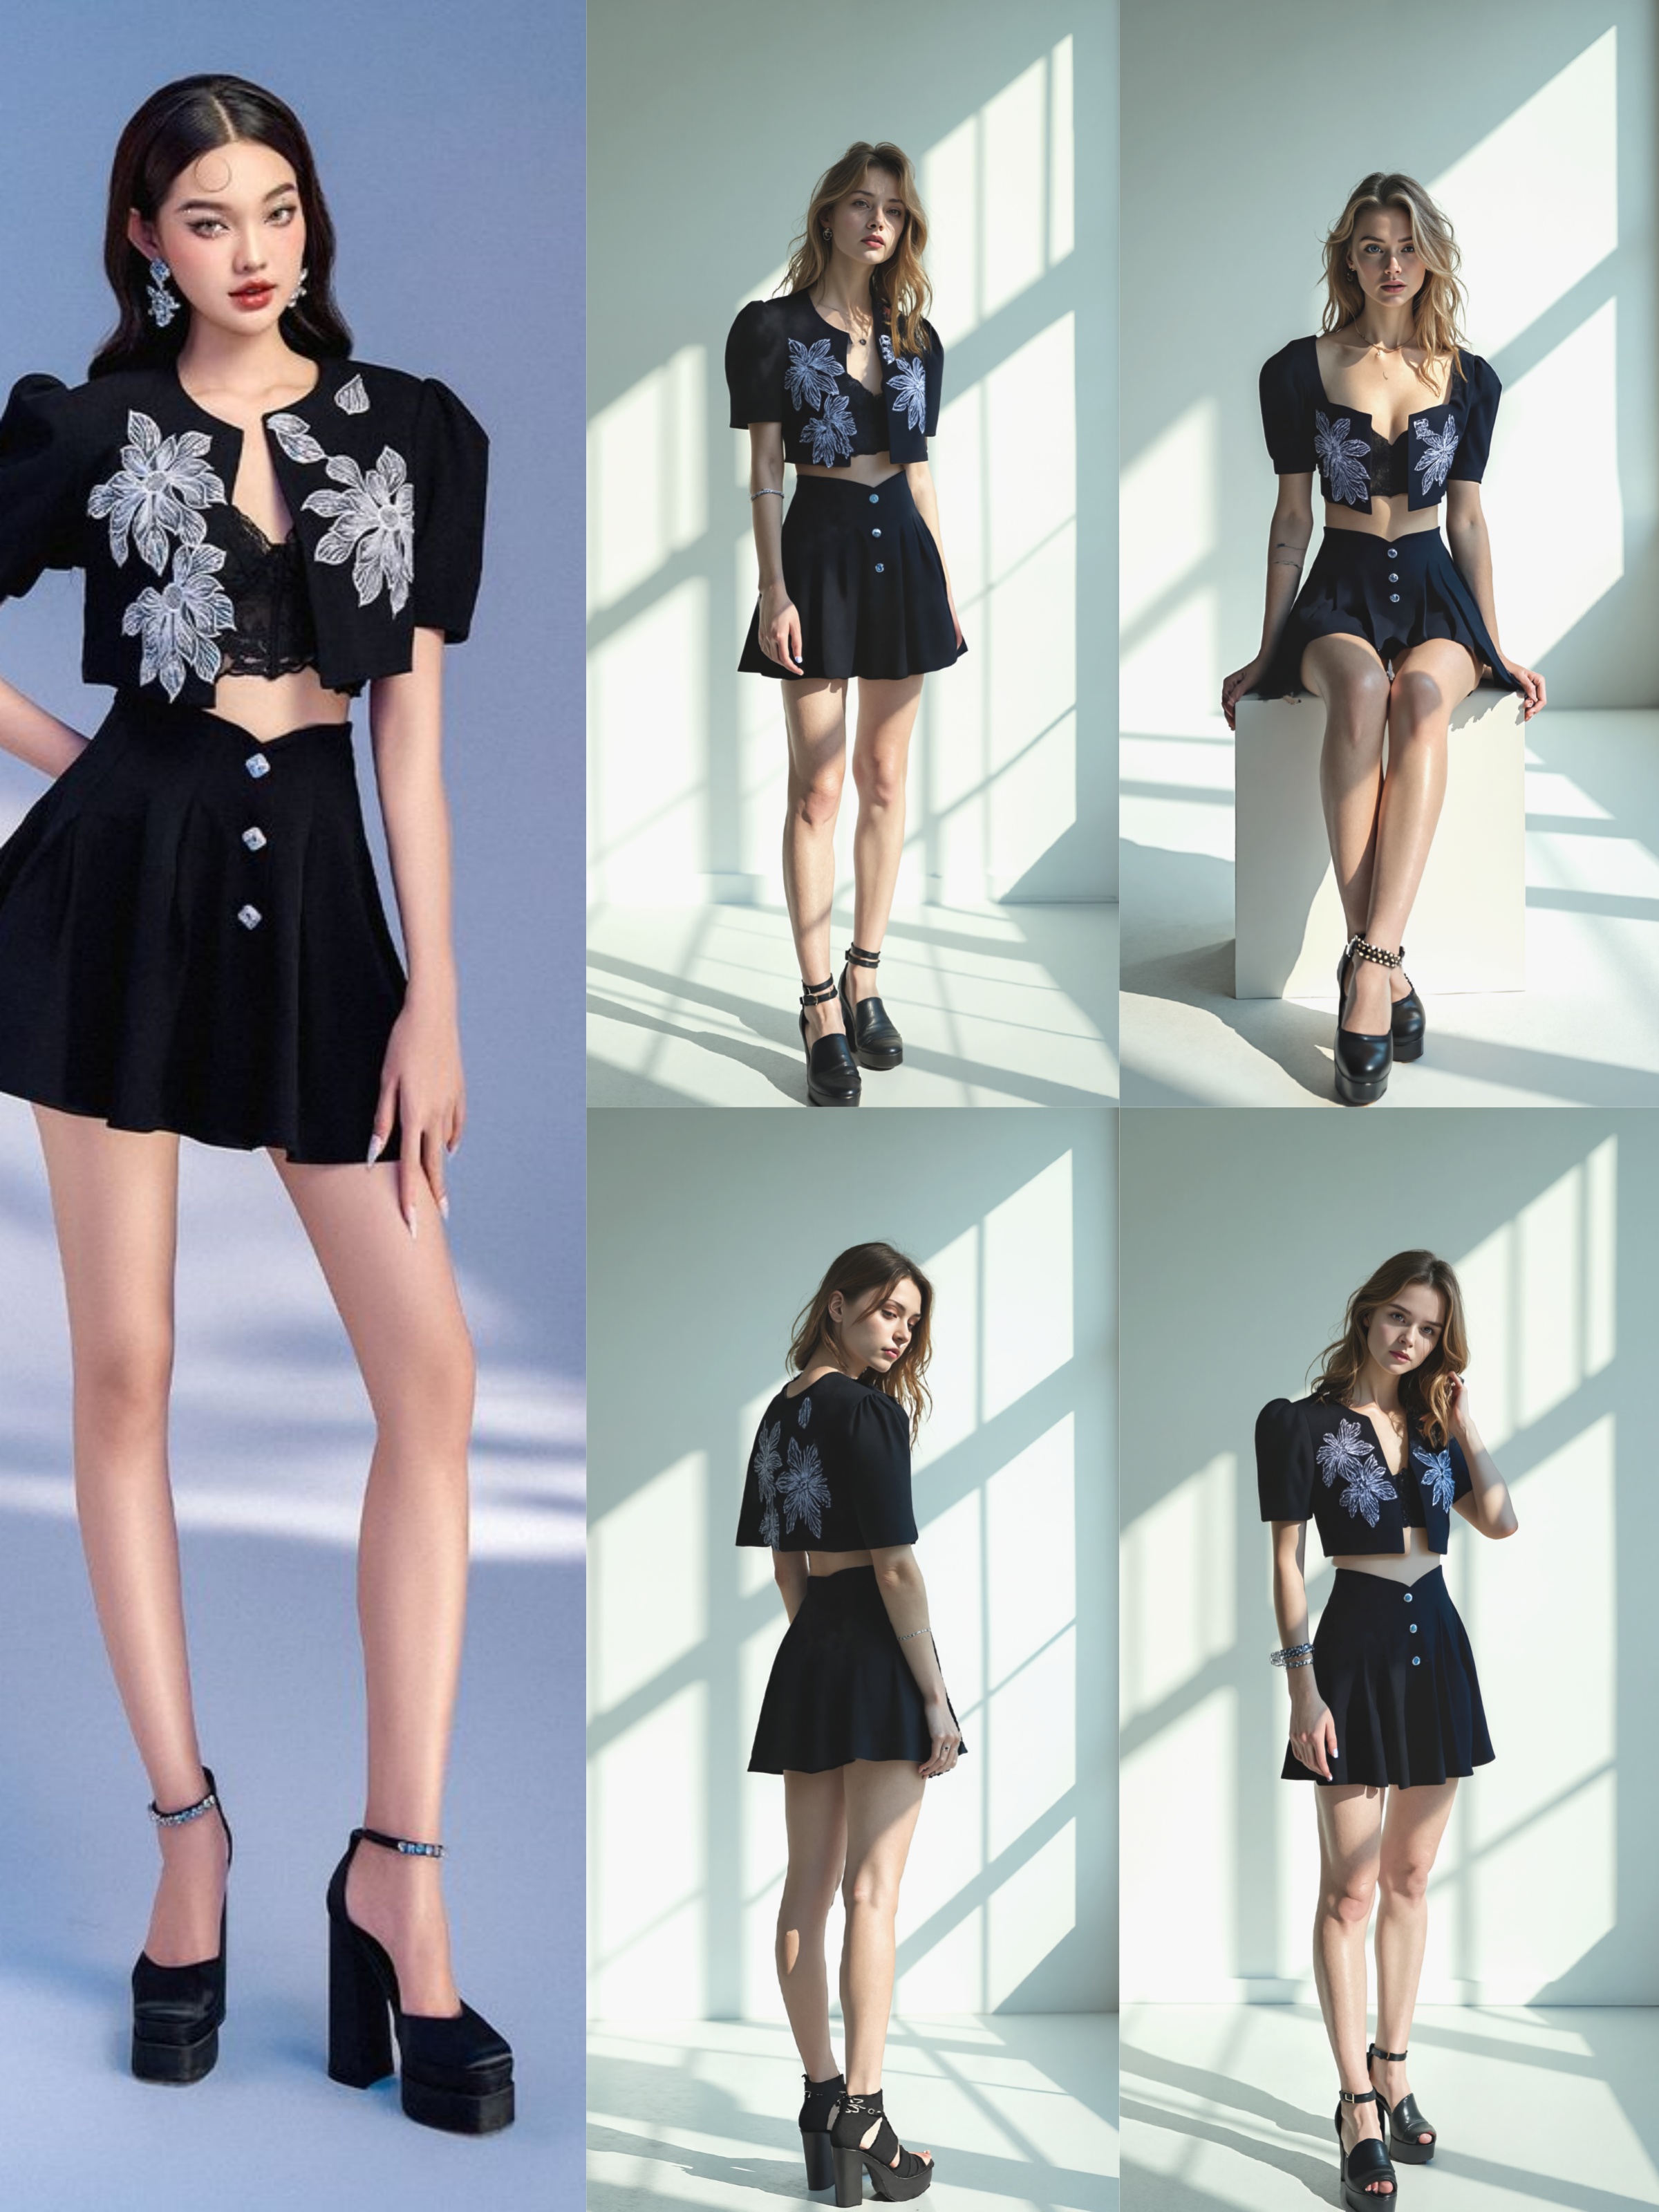
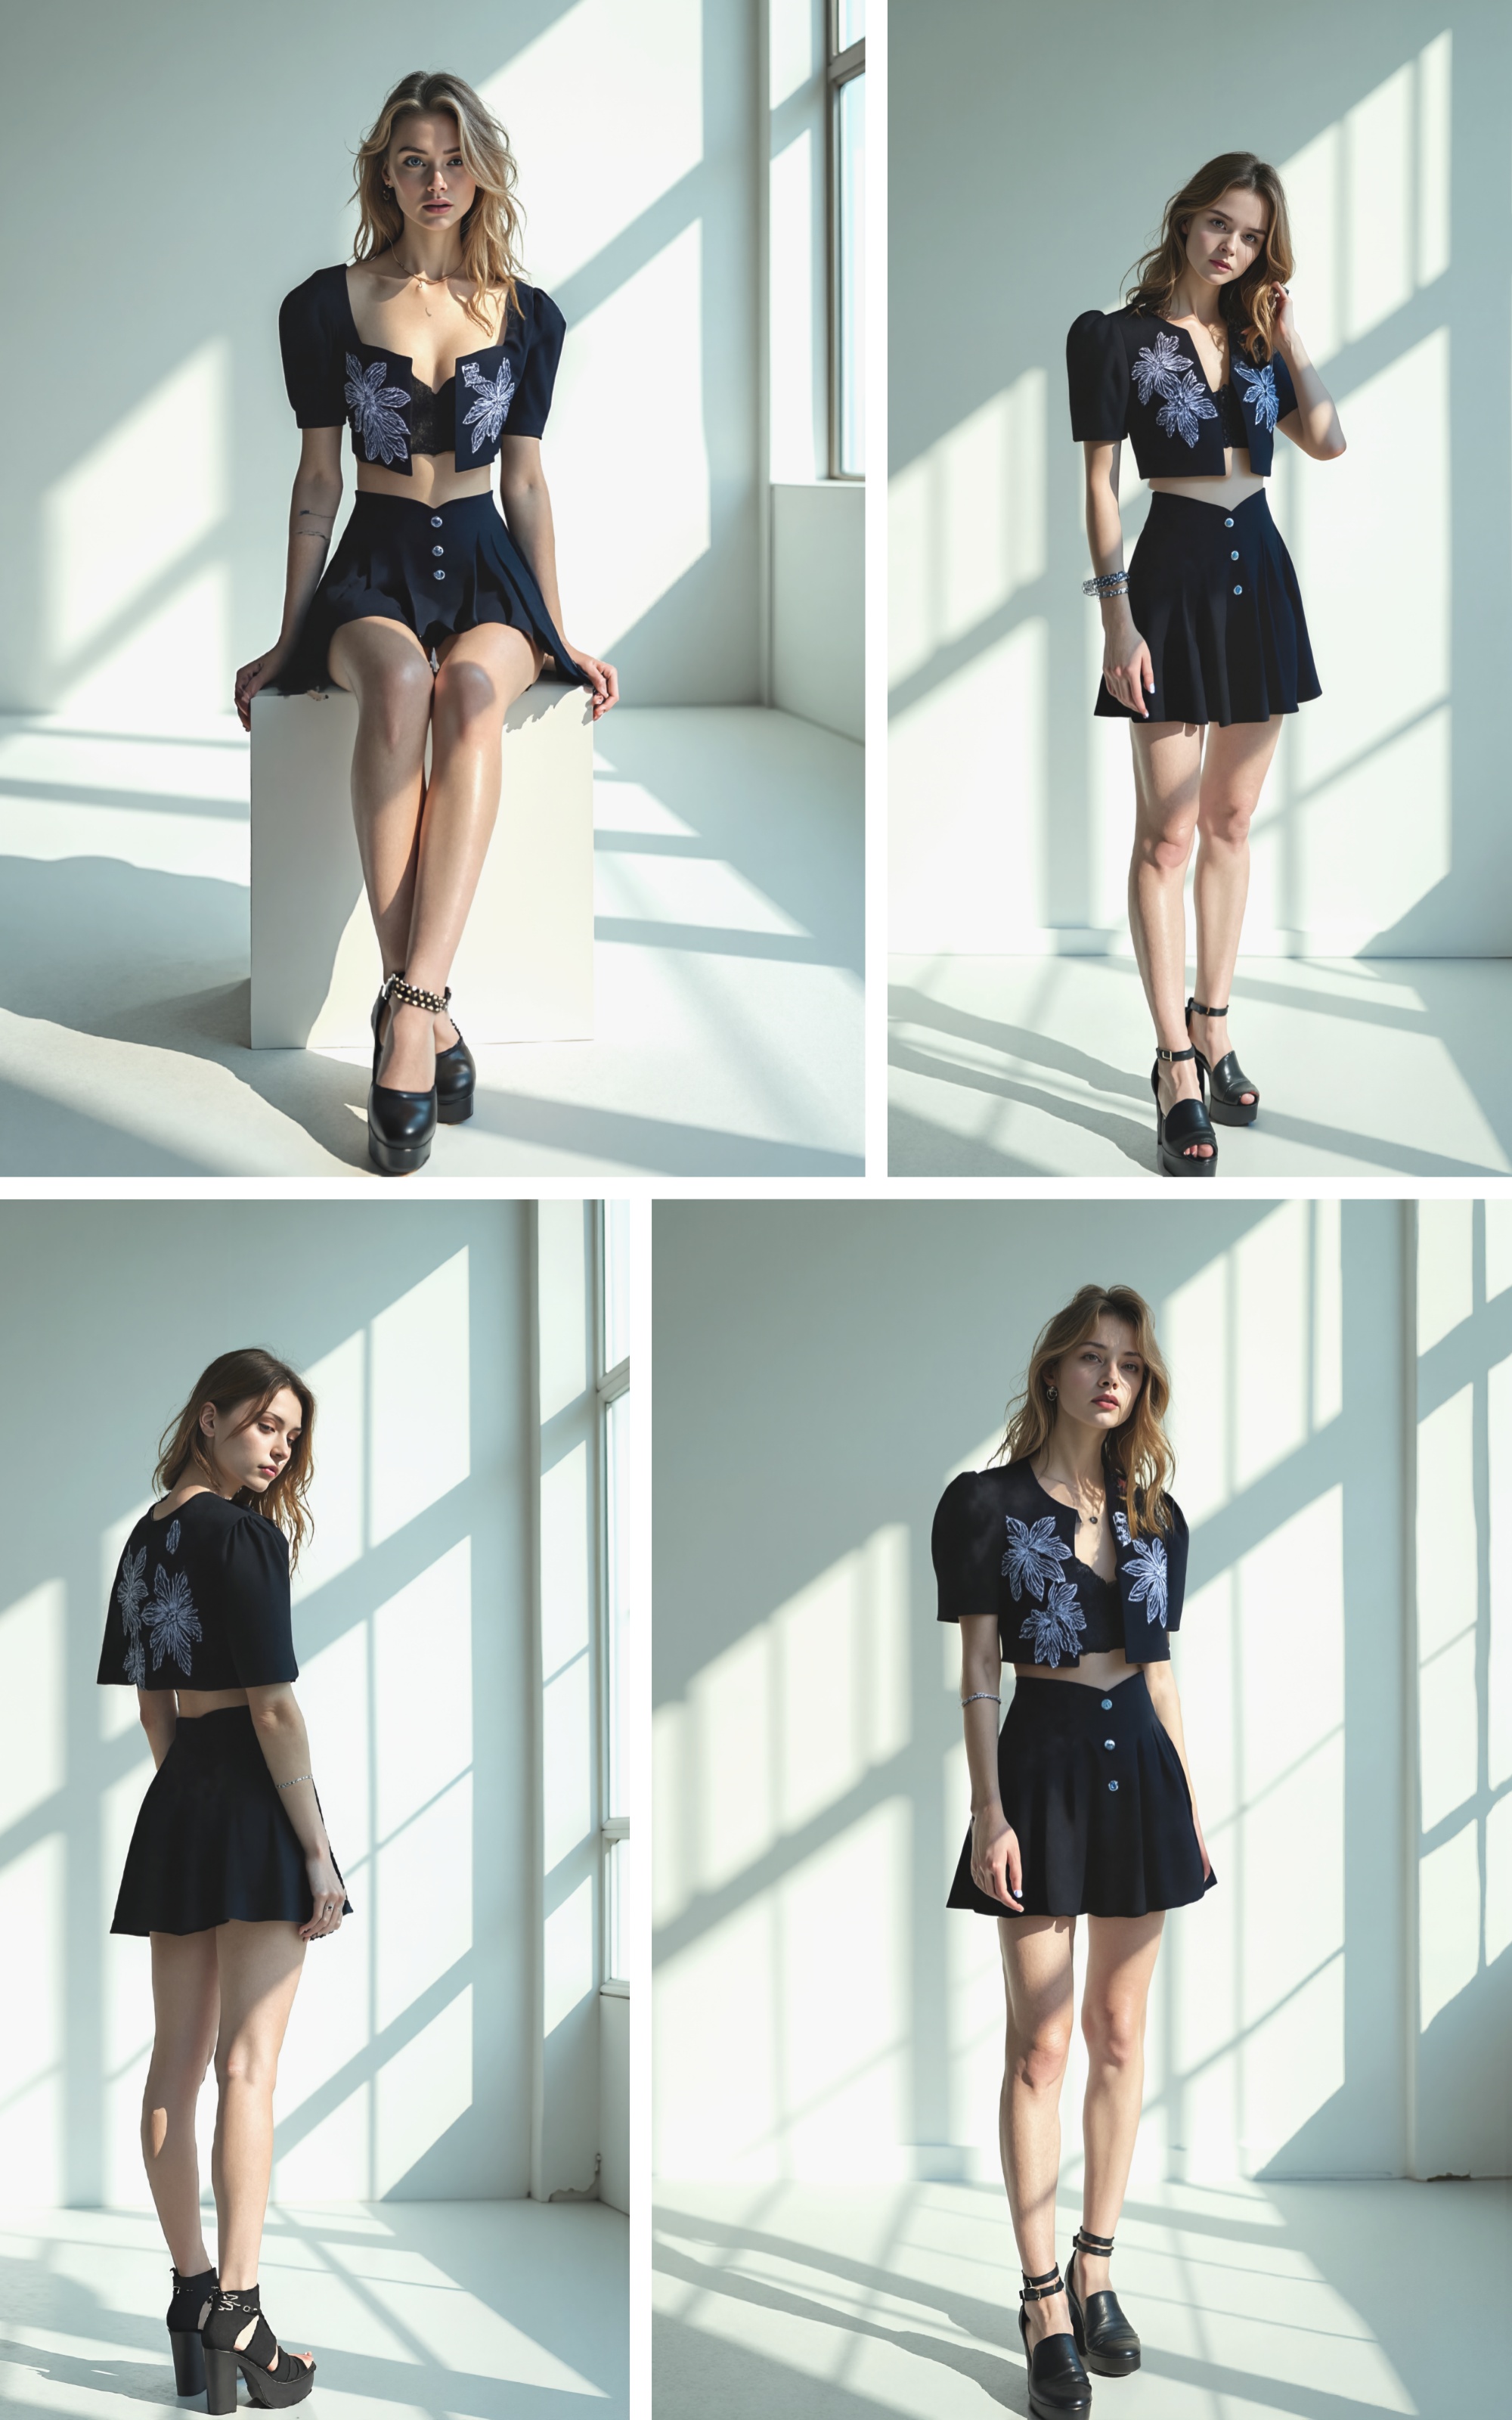
- View display effects: After a short wait, you will see the final effect of a model wearing the specified clothing, displayed from multiple angles in the set background environment. The multi-angle display allows you to comprehensively evaluate the wearing effect of the clothing and experience the perfect integration of the clothing and the environment.
- Drawbacks: Sometimes, the shapes of hands and feet may appear distorted, requiring manual repair. If you upload a front-facing clothing image to create a back view effect, the result may not be ideal, so it is recommended to upload a back-facing clothing image for back view effect creation. Lastly, if you are dissatisfied with facial details, you can process them using other face-swapping workflows.
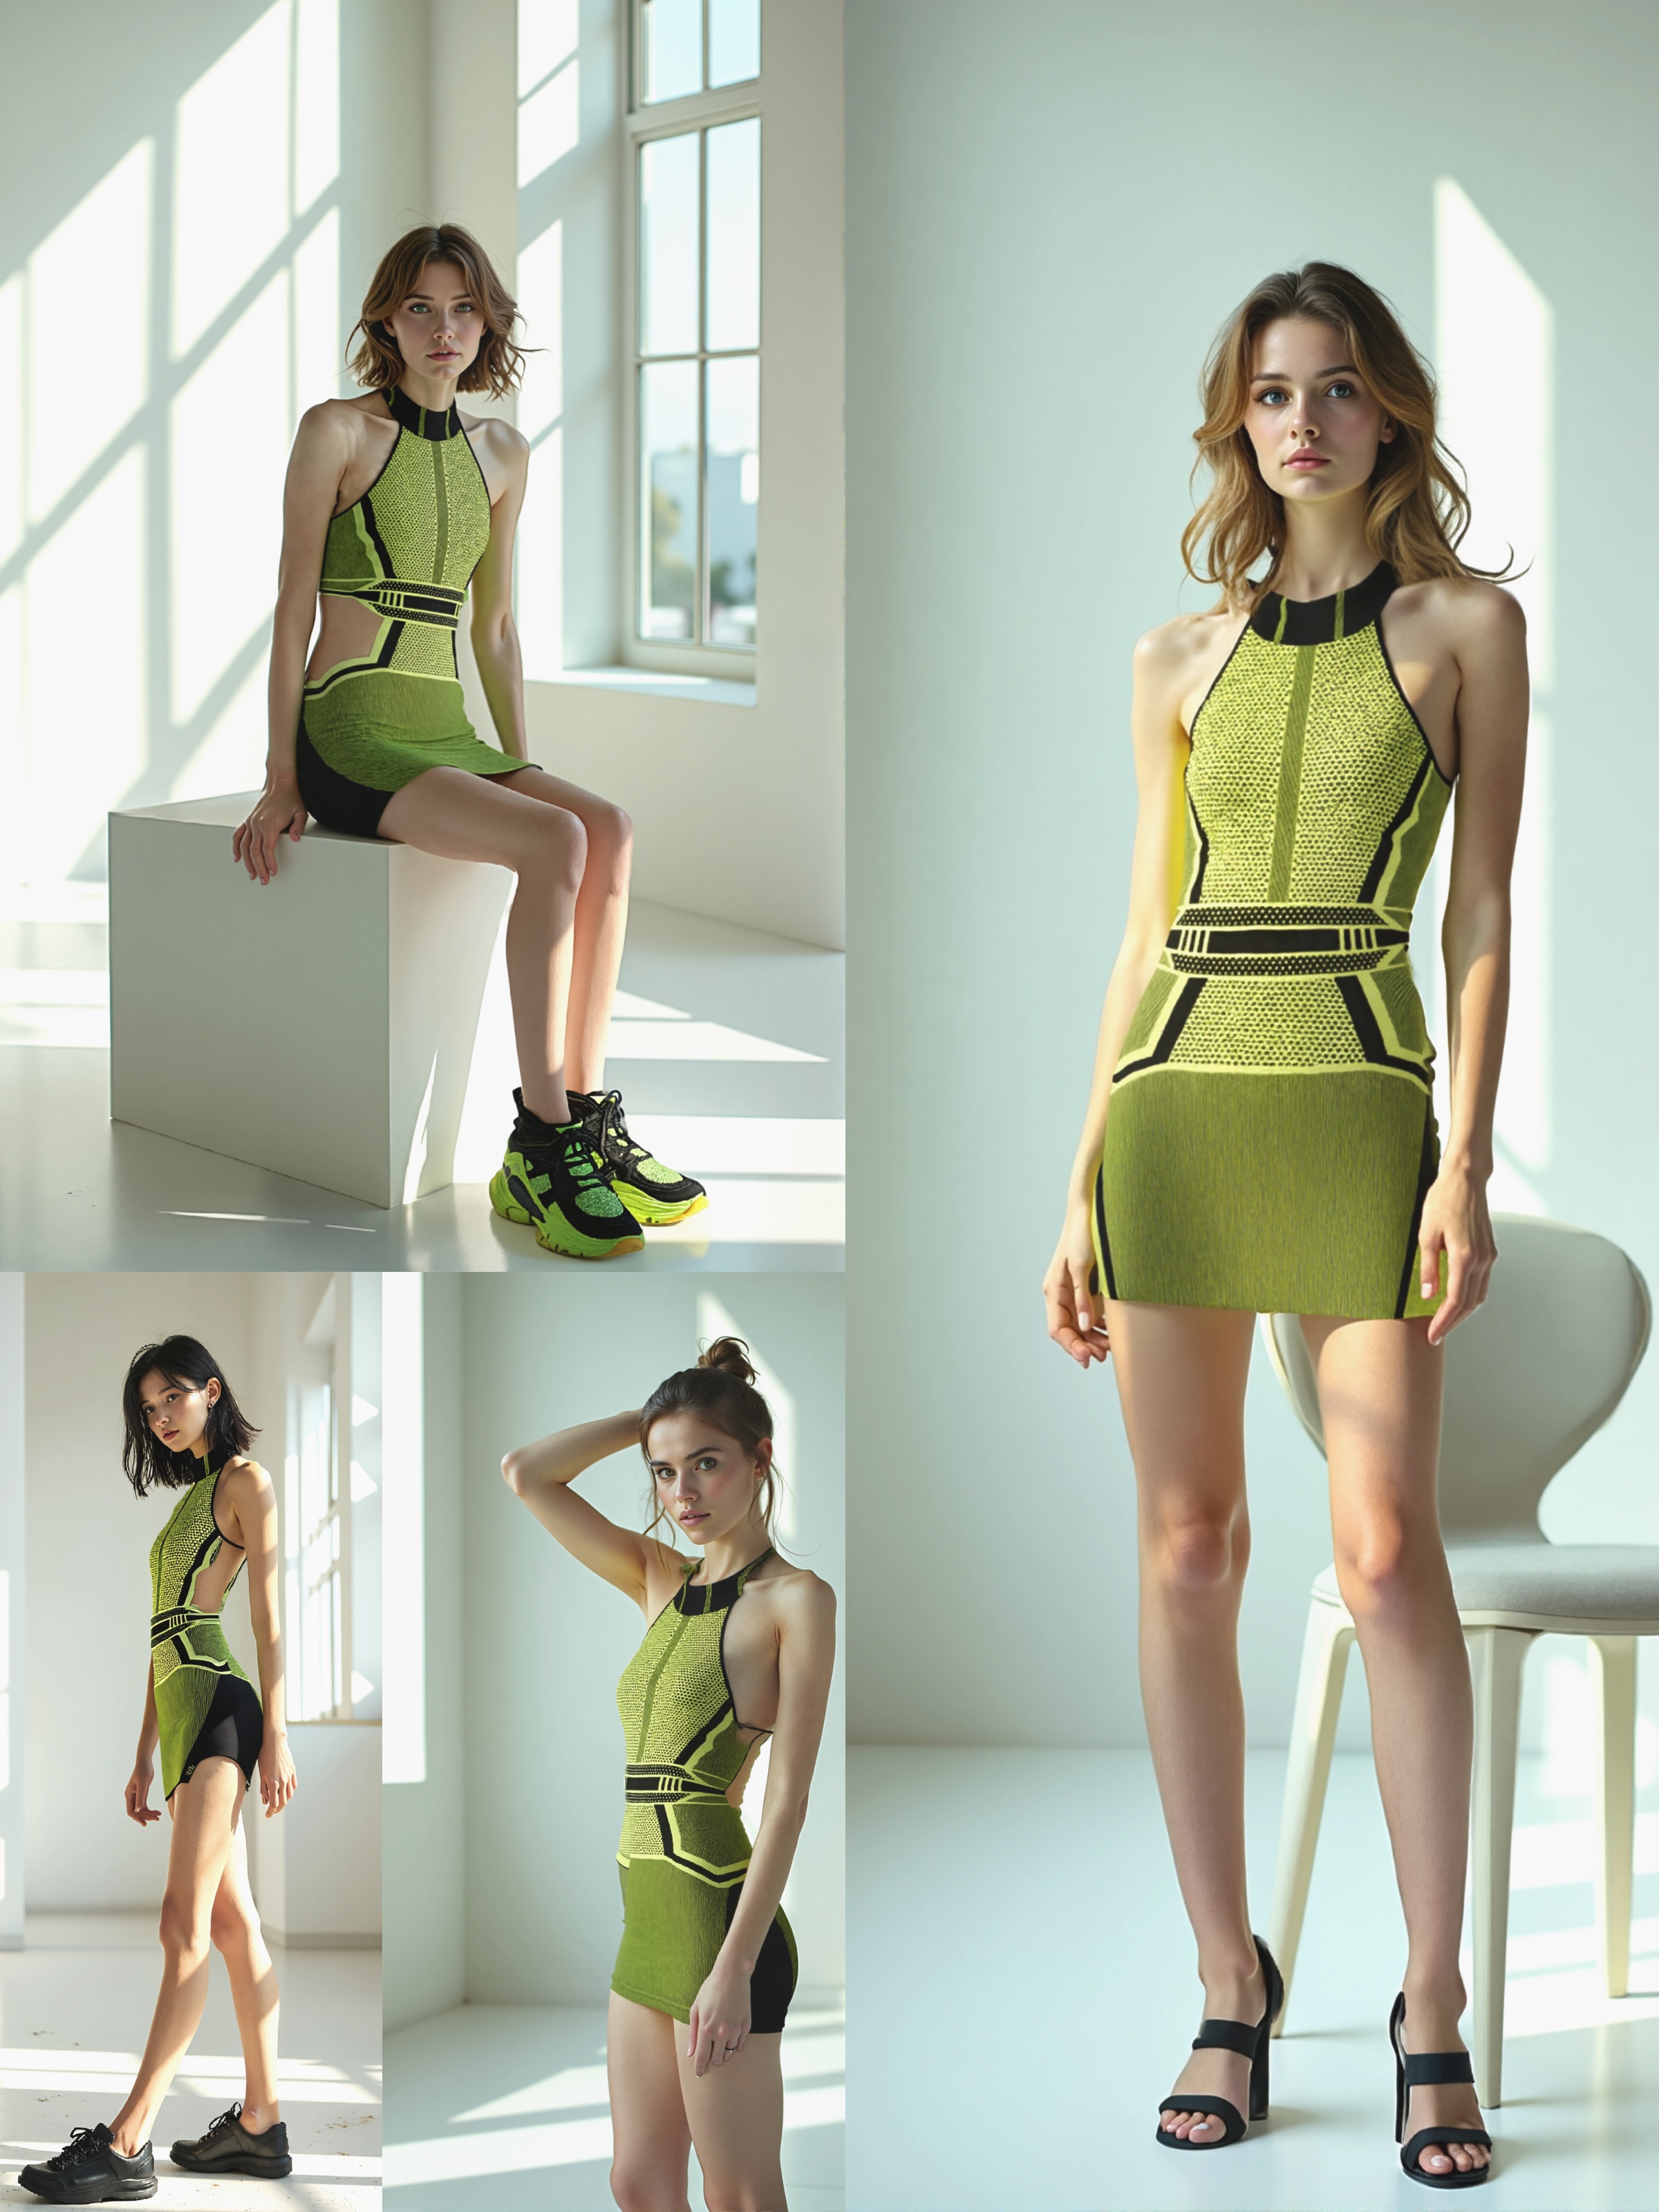
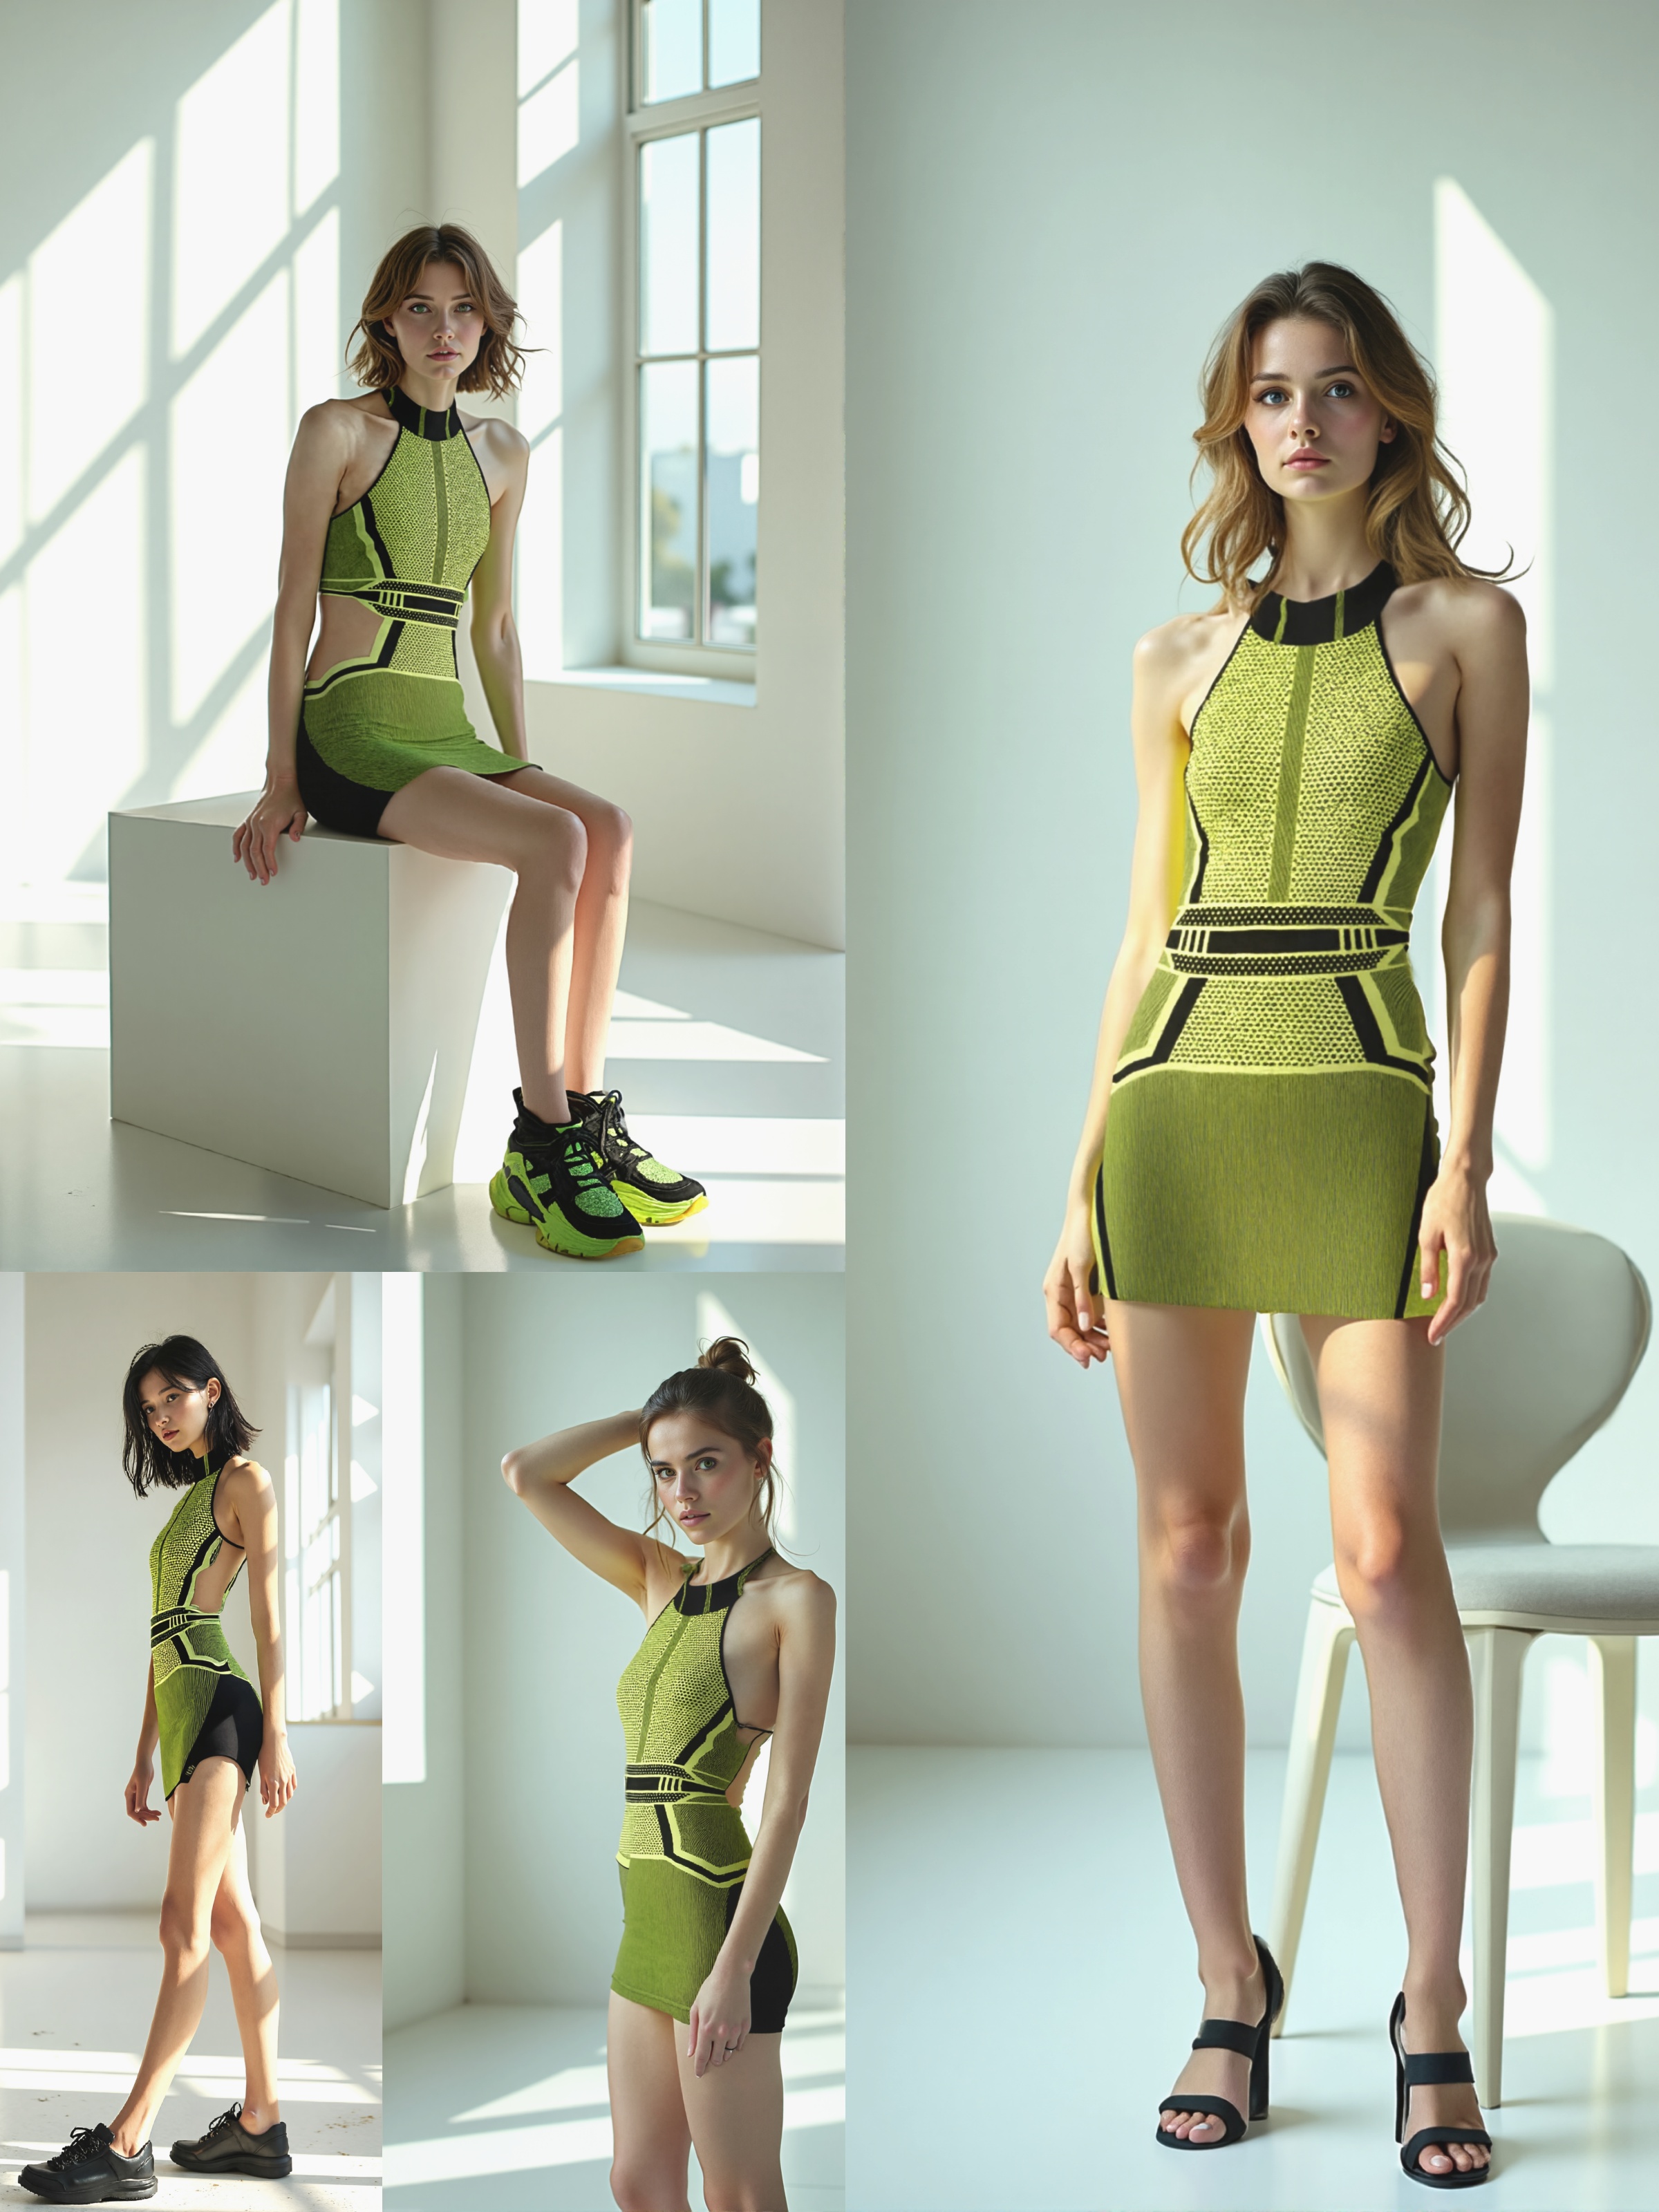
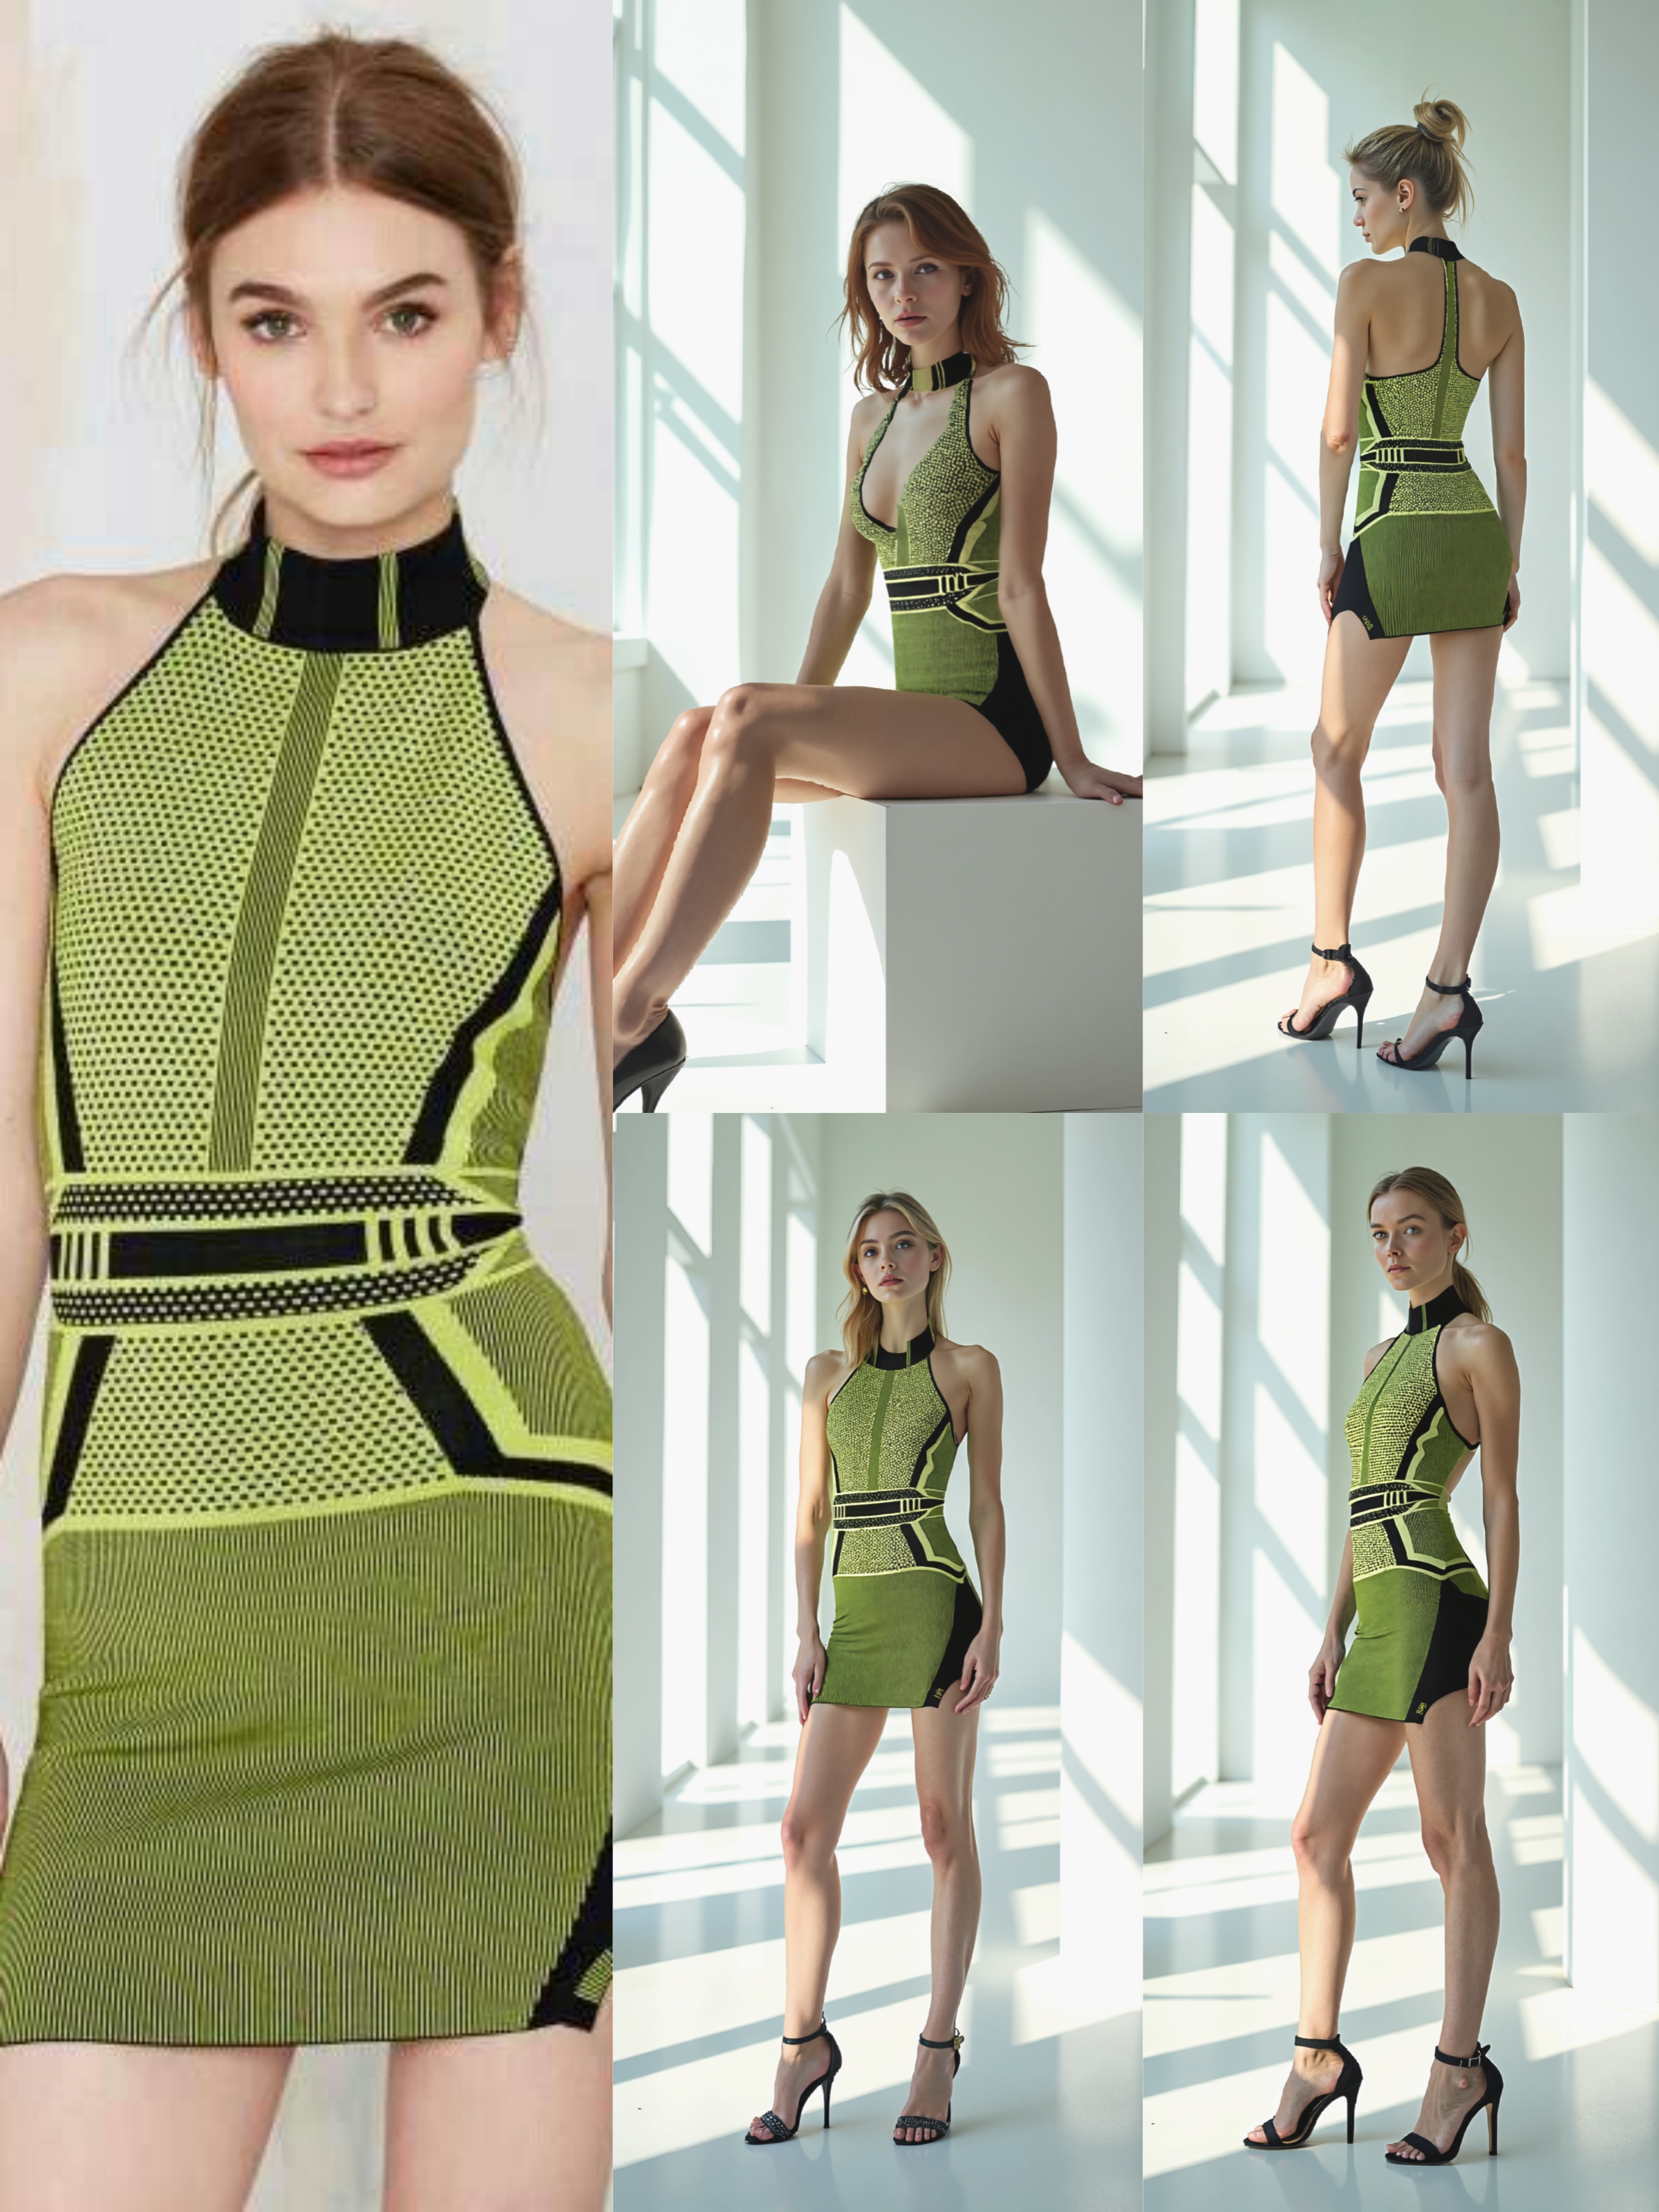
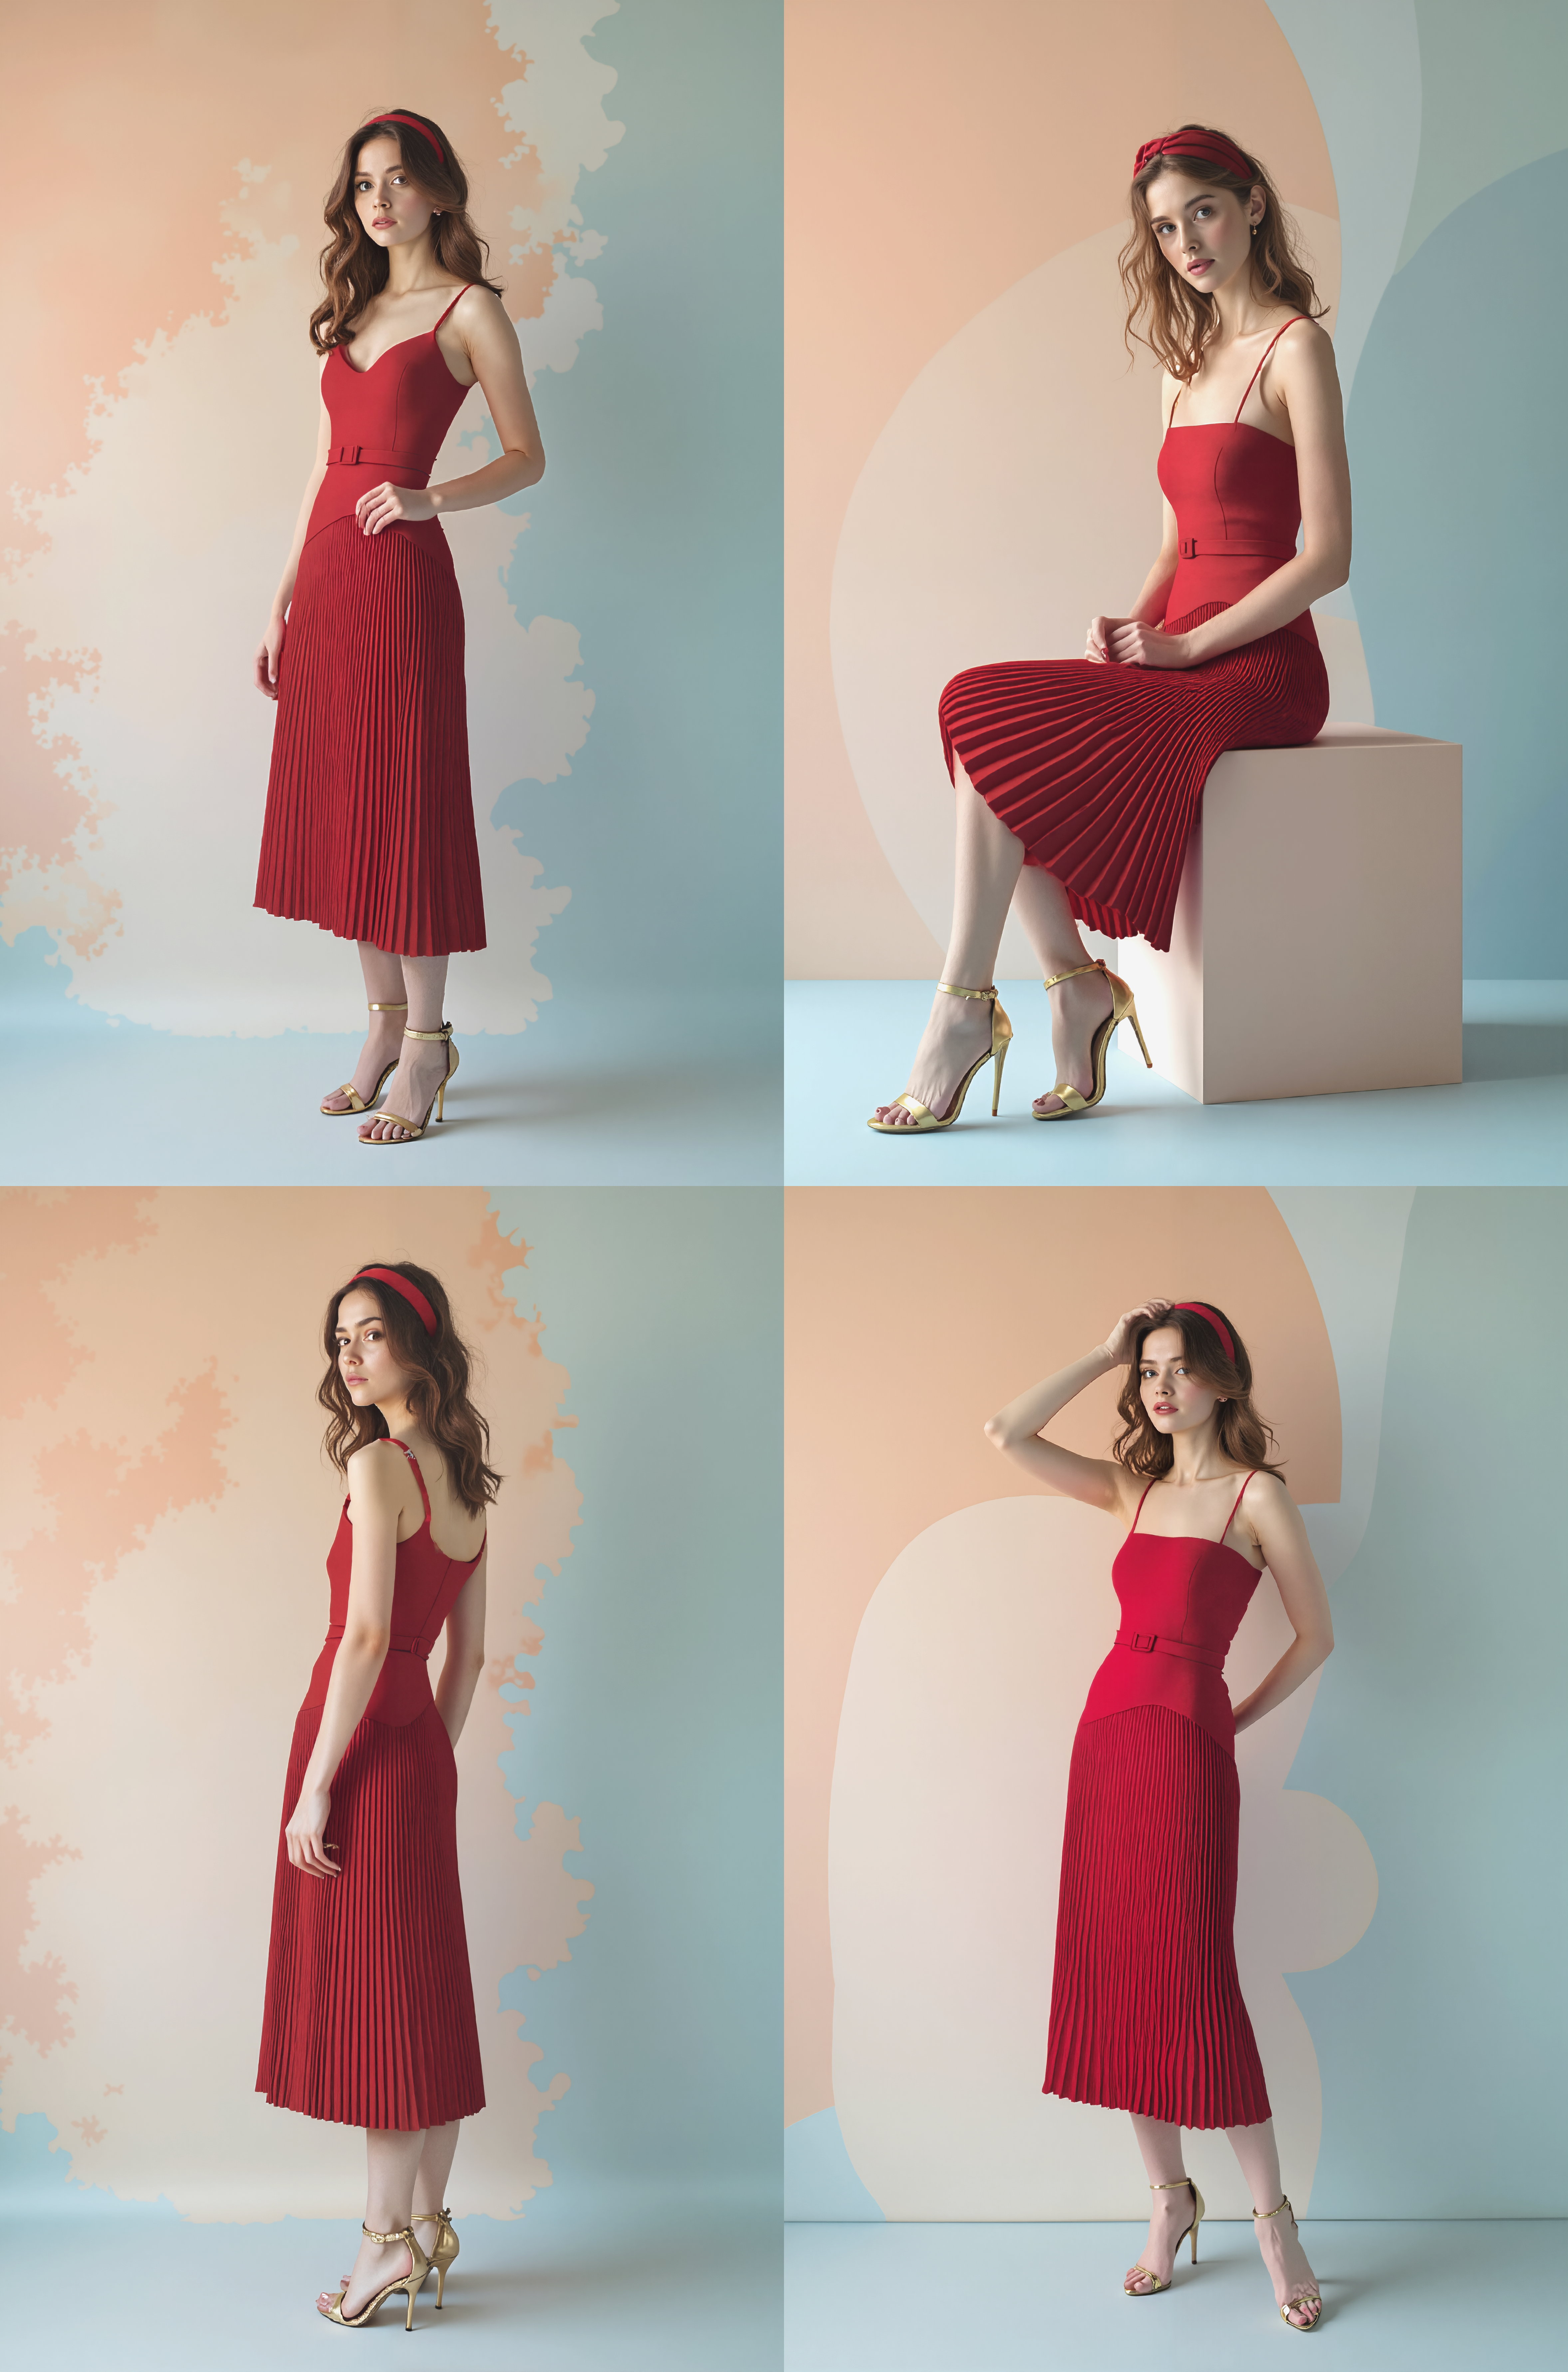
No results yet. Run the app to see them here.
Creations
Comments
Publish
' fill-opacity='0.1'/%3e %3cg id='Group_3'%3e %3cpath id='Vector_2' d='M120.897 32.556V50.6531H11.7843V32.556C11.7843 26.7872 16.4615 22.1125 22.2278 22.1125H110.448C116.219 22.1125 120.897 26.7897 120.897 32.556Z' fill='%23343434' stroke='%23343434' stroke-width='1.0339' stroke-miterlimit='10'/%3e %3cpath id='Vector_3' d='M120.896 50.401V111.286C120.896 117.075 116.202 121.766 110.413 121.766H21.8771C16.0878 121.766 11.3965 117.073 11.3965 111.286V50.401H120.896Z' fill='url(%23paint1_linear_0_4)'/%3e %3cpath id='Vector_4' d='M128.49 32.5559V111.322C128.49 117.091 123.813 121.766 118.044 121.766H110.45C116.219 121.766 120.896 117.089 120.896 111.322V32.5559C120.896 26.7871 116.219 22.1124 110.45 22.1124H118.044C123.813 22.1124 128.49 26.7896 128.49 32.5559Z' fill='url(%23paint2_linear_0_4)'/%3e %3cpath id='Vector_5' d='M113.743 60.2187H20.0924V112.618H113.743V60.2187Z' fill='url(%23paint3_linear_0_4)'/%3e %3cpath id='Vector_6' d='M33.2089 40.6525C35.7137 40.6525 37.7443 38.6219 37.7443 36.1171C37.7443 33.6122 35.7137 31.5816 33.2089 31.5816C30.704 31.5816 28.6734 33.6122 28.6734 36.1171C28.6734 38.6219 30.704 40.6525 33.2089 40.6525Z' fill='url(%23paint4_linear_0_4)'/%3e %3cpath id='Vector_7' d='M99.3508 40.6525C101.856 40.6525 103.886 38.6219 103.886 36.1171C103.886 33.6122 101.856 31.5816 99.3508 31.5816C96.8459 31.5816 94.8153 33.6122 94.8153 36.1171C94.8153 38.6219 96.8459 40.6525 99.3508 40.6525Z' fill='url(%23paint5_linear_0_4)'/%3e %3cpath id='Vector_8' d='M80.8 40.6498H51.7546C49.2506 40.6498 47.2191 38.6183 47.2191 36.1144C47.2191 33.6104 49.2506 31.5789 51.7546 31.5789H80.8C83.3039 31.5789 85.3354 33.6104 85.3354 36.1144C85.3354 38.6208 83.3064 40.6498 80.8 40.6498Z' fill='url(%23paint6_linear_0_4)'/%3e %3cg id='Group_4'%3e %3cpath id='Vector_9' d='M43.7699 82.9259C43.2875 82.9259 42.8176 82.6747 42.559 82.2271C42.1736 81.5607 42.4023 80.7054 43.0687 80.32L47.8802 77.5425L43.0687 74.765C42.4023 74.3796 42.1736 73.5267 42.559 72.8578C42.9444 72.1914 43.7973 71.9627 44.4662 72.3481L51.3713 76.334C51.804 76.5827 52.07 77.0452 52.07 77.5425C52.07 78.0398 51.804 78.5023 51.3713 78.7509L44.4662 82.7369C44.2473 82.8662 44.0061 82.9259 43.7699 82.9259Z' fill='%23545454'/%3e %3c/g%3e %3cg id='Group_5'%3e %3cpath id='Vector_10' d='M87.164 82.9264C86.9278 82.9264 86.6866 82.8668 86.4678 82.74L79.5626 78.754C79.13 78.5054 78.8639 78.0429 78.8639 77.5456C78.8639 77.0482 79.13 76.5857 79.5626 76.3371L86.4678 72.3512C87.1342 71.9657 87.9895 72.1945 88.375 72.8609C88.7604 73.5273 88.5316 74.3827 87.8652 74.7681L83.0538 77.5456L87.8652 80.323C88.5316 80.7084 88.7604 81.5613 88.375 82.2302C88.1164 82.6753 87.6464 82.9264 87.164 82.9264Z' fill='%23545454'/%3e %3c/g%3e %3cpath id='Vector_11' d='M75.315 96.7118C75.315 100.755 70.68 100.678 64.966 100.678C59.2519 100.678 54.6169 100.755 54.6169 96.7118C54.6169 92.6687 59.2519 89.3914 64.966 89.3914C70.68 89.3914 75.315 92.6687 75.315 96.7118Z' fill='%23545454'/%3e %3cg id='Vector_12'%3e %3c/g%3e %3cpath id='Vector_13' d='M91.547 100.28C91.5668 100.262 91.5842 100.242 91.6041 100.223C91.624 100.203 91.6414 100.185 91.6613 100.165C93.8594 97.8926 92.9494 94.1006 89.9779 93.024C89.9779 93.024 86.6211 91.6265 83.8387 91.6439C83.3911 91.6464 83.0305 92.007 83.028 92.4545C83.0106 95.237 84.4081 98.5938 84.4081 98.5938C85.4823 101.568 89.2743 102.478 91.547 100.28Z' fill='%23545454'/%3e %3c/g%3e %3cg id='Group_6'%3e %3cpath id='Vector_14' d='M23.3562 131.481C34.6295 131.481 43.7683 122.343 43.7683 111.069C43.7683 99.796 34.6295 90.6572 23.3562 90.6572C12.083 90.6572 2.94415 99.796 2.94415 111.069C2.94415 122.343 12.083 131.481 23.3562 131.481Z' fill='url(%23paint7_linear_0_4)'/%3e %3cpath id='Union' d='M23.3205 119.465C24.8852 119.465 26.1535 120.734 26.1535 122.298C26.1535 123.863 24.8852 125.131 23.3205 125.131C21.7557 125.131 20.4875 123.863 20.4875 122.298C20.4875 120.734 21.7557 119.465 23.3205 119.465ZM23.298 98.5319C24.876 98.532 26.1554 99.8113 26.1554 101.389V113.47C26.1554 115.048 24.8759 116.328 23.298 116.328C21.72 116.328 20.4406 115.048 20.4406 113.47V101.389C20.4406 99.8112 21.7199 98.5319 23.298 98.5319Z' fill='url(%23paint8_linear_0_4)' fill-opacity='0.4'/%3e %3c/g%3e %3c/g%3e %3cpath id='Vector_15' d='M28.2613 12.0967C29.294 12.0967 30.1311 11.2596 30.1311 10.2269C30.1311 9.19415 29.294 8.35697 28.2613 8.35697C27.2285 8.35697 26.3914 9.19415 26.3914 10.2269C26.3914 11.2596 27.2285 12.0967 28.2613 12.0967Z' fill='%23424243' fill-opacity='0.5'/%3e %3cpath id='Vector_16' d='M34.3089 8.35978C36.6174 8.35978 38.4888 6.48838 38.4888 4.17989C38.4888 1.8714 36.6174 0 34.3089 0C32.0005 0 30.1291 1.8714 30.1291 4.17989C30.1291 6.48838 32.0005 8.35978 34.3089 8.35978Z' fill='%23424243' fill-opacity='0.5'/%3e %3cpath id='Vector_17' d='M139.205 106.829C140.341 106.829 141.261 105.909 141.261 104.773C141.261 103.637 140.341 102.717 139.205 102.717C138.069 102.717 137.148 103.637 137.148 104.773C137.148 105.909 138.069 106.829 139.205 106.829Z' fill='%23424243' fill-opacity='0.5'/%3e %3cpath id='Vector_18' d='M142.773 98.8149C144.742 98.8149 146.338 97.2184 146.338 95.2492C146.338 93.2799 144.742 91.6834 142.773 91.6834C140.803 91.6834 139.207 93.2799 139.207 95.2492C139.207 97.2184 140.803 98.8149 142.773 98.8149Z' fill='%23424243' fill-opacity='0.5'/%3e %3cpath id='Vector_19' d='M106.371 12.0994C107.879 12.0994 109.101 10.8771 109.101 9.36919C109.101 7.86132 107.879 6.63896 106.371 6.63896C104.863 6.63896 103.641 7.86132 103.641 9.36919C103.641 10.8771 104.863 12.0994 106.371 12.0994Z' fill='%23424243' fill-opacity='0.5'/%3e %3c/g%3e %3cdefs%3e %3clinearGradient id='paint0_linear_0_4' x1='66.9155' y1='6.63896' x2='66.9155' y2='140.47' gradientUnits='userSpaceOnUse'%3e %3cstop stop-color='%23BEC4CA'/%3e %3cstop offset='1' stop-color='%23BEC4CA' stop-opacity='0'/%3e %3c/linearGradient%3e %3clinearGradient id='paint1_linear_0_4' x1='66.1463' y1='50.401' x2='66.1463' y2='121.766' gradientUnits='userSpaceOnUse'%3e %3cstop stop-color='%23343434'/%3e %3cstop offset='1' stop-color='%235D5D5D'/%3e %3c/linearGradient%3e %3clinearGradient id='paint2_linear_0_4' x1='128.751' y1='71.9391' x2='117.99' y2='71.9391' gradientUnits='userSpaceOnUse'%3e %3cstop offset='3.40978e-07' stop-color='%23404041'/%3e %3cstop offset='1' stop-color='%23434343'/%3e %3c/linearGradient%3e %3clinearGradient id='paint3_linear_0_4' x1='20.0924' y1='86.4182' x2='113.743' y2='86.4182' gradientUnits='userSpaceOnUse'%3e %3cstop stop-color='%23323131'/%3e %3cstop offset='1' stop-color='%233B3B3B'/%3e %3c/linearGradient%3e %3clinearGradient id='paint4_linear_0_4' x1='28.6734' y1='36.1171' x2='37.7443' y2='36.1171' gradientUnits='userSpaceOnUse'%3e %3cstop stop-color='%23424242'/%3e %3cstop offset='1' stop-color='%236E6B6B'/%3e %3c/linearGradient%3e %3clinearGradient id='paint5_linear_0_4' x1='94.8153' y1='36.1171' x2='103.886' y2='36.1171' gradientUnits='userSpaceOnUse'%3e %3cstop stop-color='%23424242'/%3e %3cstop offset='1' stop-color='%236E6B6B'/%3e %3c/linearGradient%3e %3clinearGradient id='paint6_linear_0_4' x1='47.2191' y1='36.1144' x2='85.3354' y2='36.1144' gradientUnits='userSpaceOnUse'%3e %3cstop stop-color='%23424242'/%3e %3cstop offset='1' stop-color='%236E6B6B'/%3e %3c/linearGradient%3e %3clinearGradient id='paint7_linear_0_4' x1='23.3562' y1='90.6572' x2='23.3562' y2='131.481' gradientUnits='userSpaceOnUse'%3e %3cstop stop-color='%23414141'/%3e %3cstop offset='1' stop-color='%23595656'/%3e %3c/linearGradient%3e %3clinearGradient id='paint8_linear_0_4' x1='23.298' y1='98.5319' x2='23.298' y2='125.131' gradientUnits='userSpaceOnUse'%3e %3cstop stop-color='%236E6E6E'/%3e %3cstop offset='1' stop-color='%237F7F7F'/%3e %3c/linearGradient%3e %3c/defs%3e %3c/svg%3e)
No creations yet
History Record
History Record
API Task

No creations available.